Check and resolve Excel error messages
When a spreadsheet is full of error messages, it cannot be handed over to a client or colleague without concern. Manually checking each error, such as #VALUE!, is a laborious task and generally not a favorite. With PerfectXL, you immediately see where the error messages are, which cells they refer to, and the risk level of each error message. This way, you can clear them up in no time.
- Download the sample file to follow the steps.
- Already working with PerfectXL? Then jump to the solution with PerfectXL.

Step-by-step without PerfectXL
Step 1: Search with the search window
If you are tasked with managing an Excel model that is full of errors, you would naturally want to review and, where possible, resolve or mitigate them. By errors, we mean the values in a cell of a spreadsheet that begin with a # and end with an exclamation mark, for example, #VALUE!
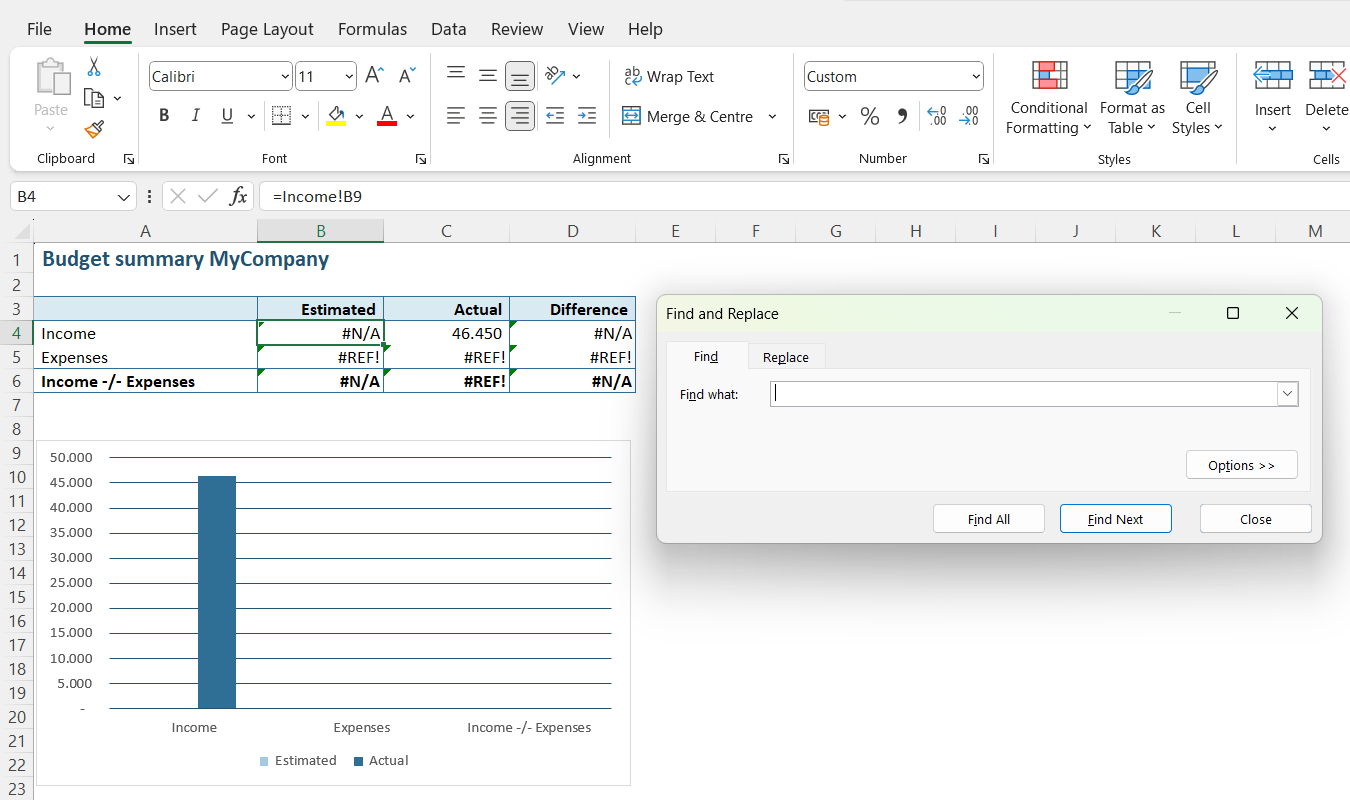
The most obvious way to go through Excel error messages without PerfectXL is to manually search for them one by one in your Excel model. For this, you use the search window in Excel (CTRL+F).
Step 2a: The right search query
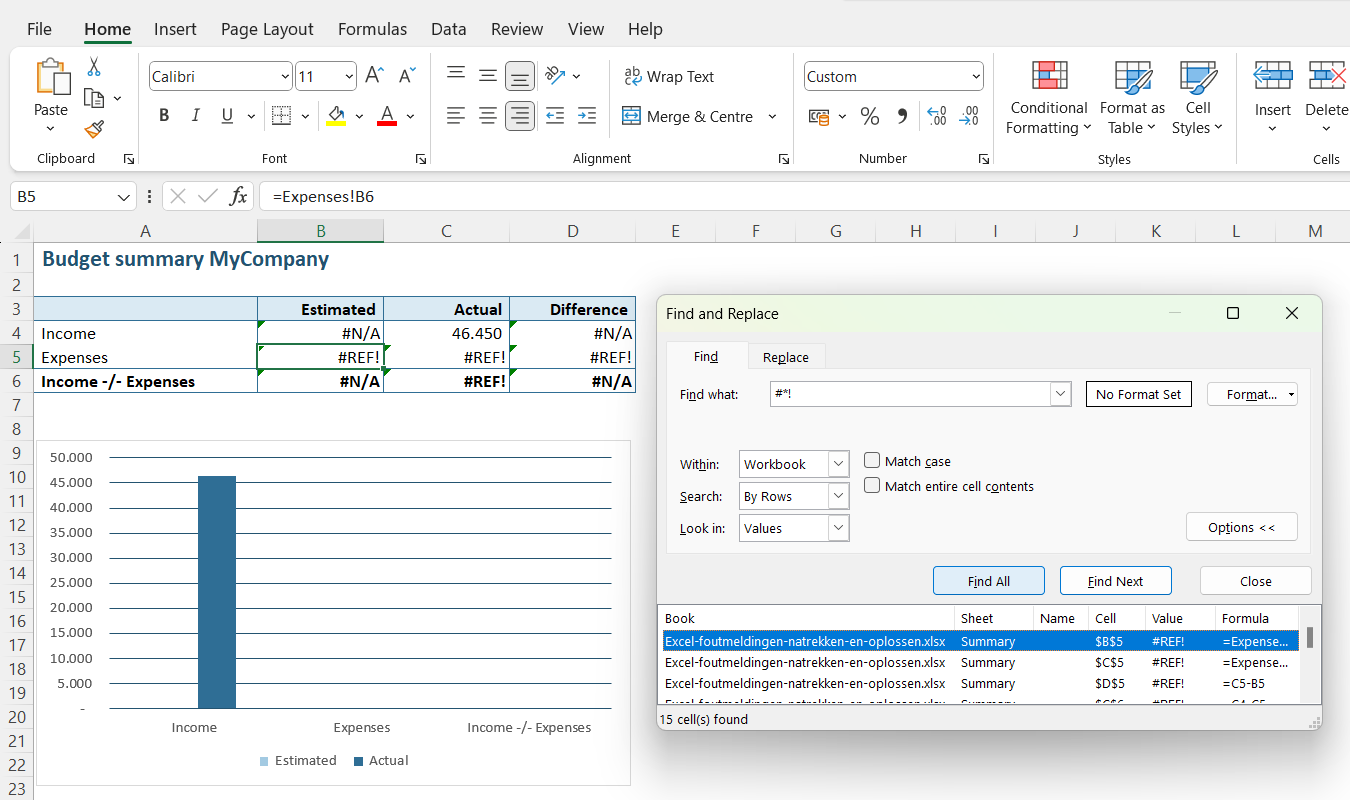
All Excel error messages have the form #[error_name]!, except for #NAME? and #N/A. You can search for the first form in bulk by using the search window to look for #*!. In this search query, the hashtag represents the beginning of an error message, the asterisk represents any number of characters, and the exclamation mark represents the end of the error message.
Step 2b: Search in values
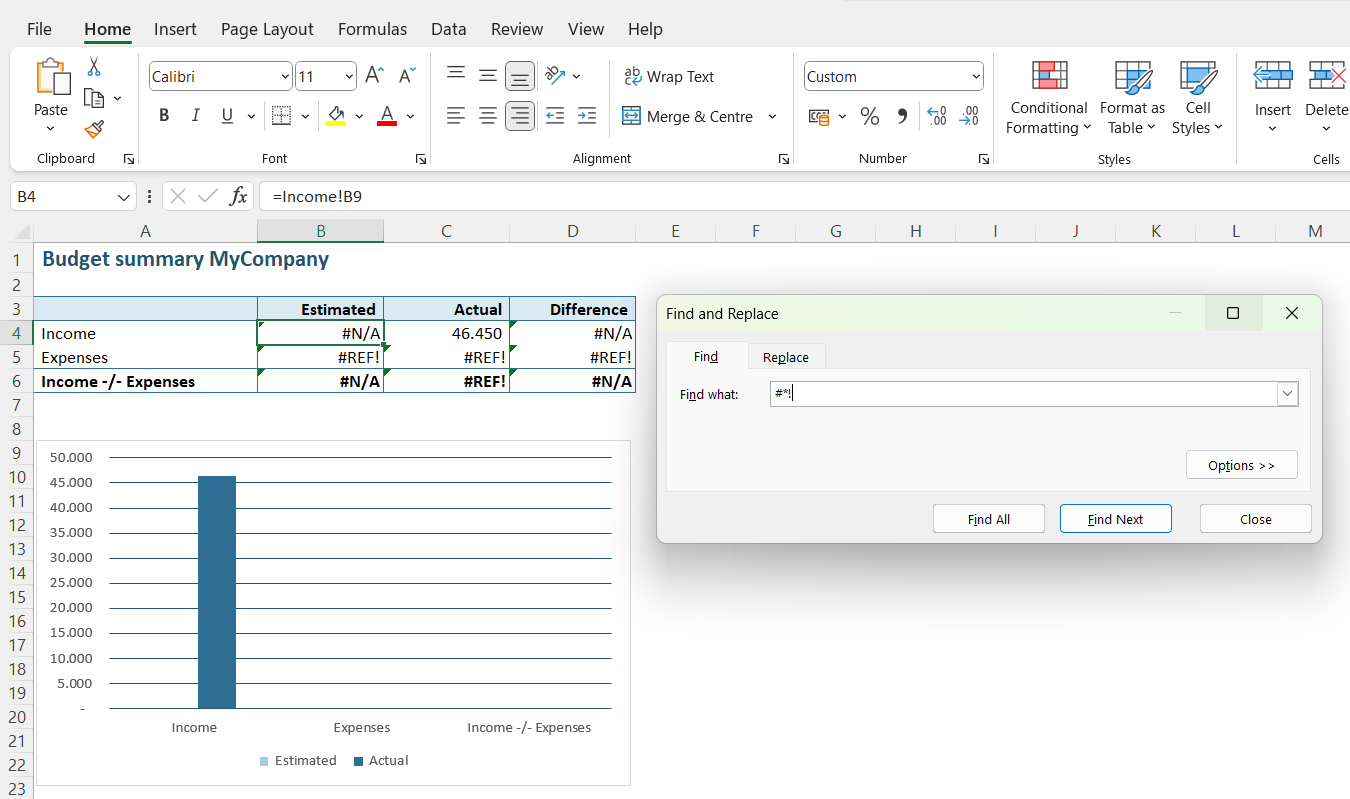
Before you begin searching, click on the “Options >>” button and set the search for “Within” to “Workbook” (to search the entire model) and set “Look in” to “Values”.
Step 2c: Find all
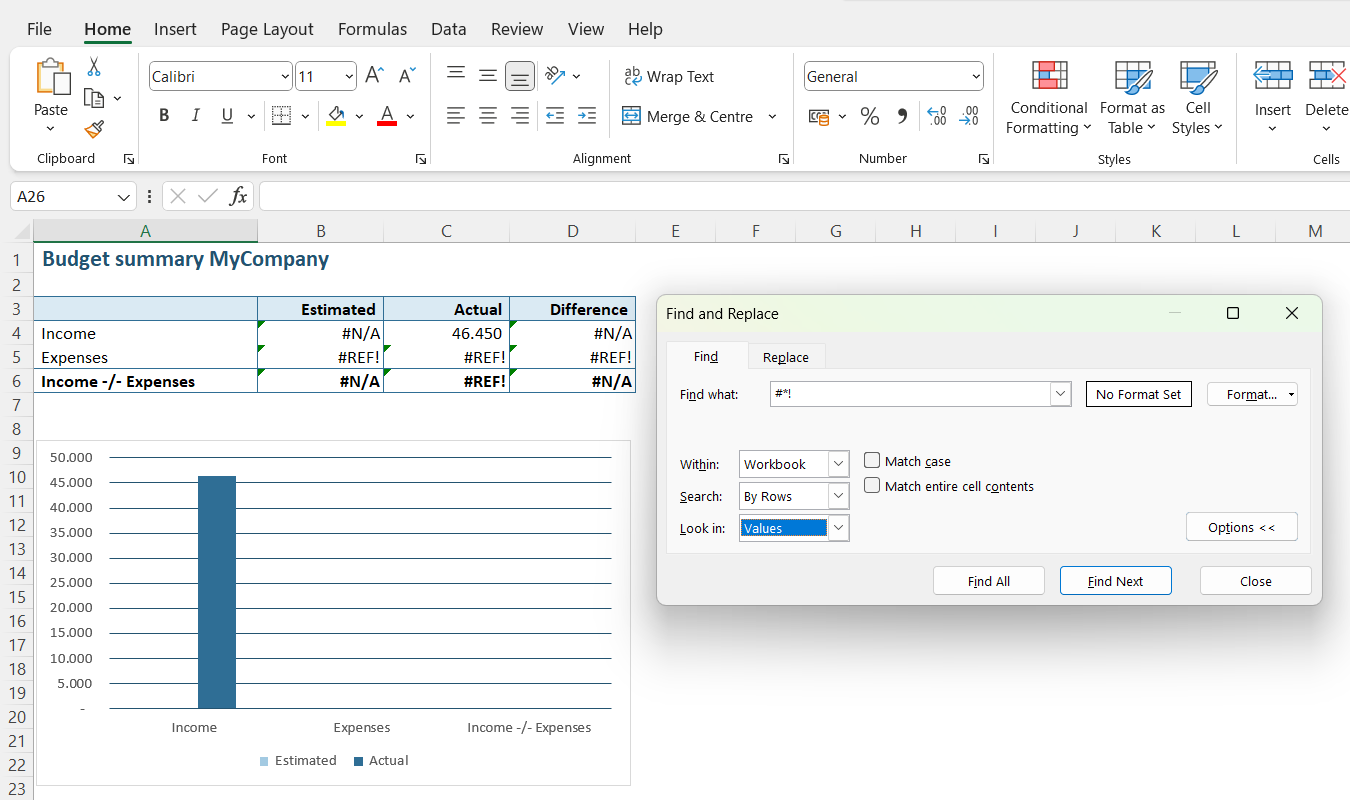
Then click on “Find all.”
Step 3: Check all errors
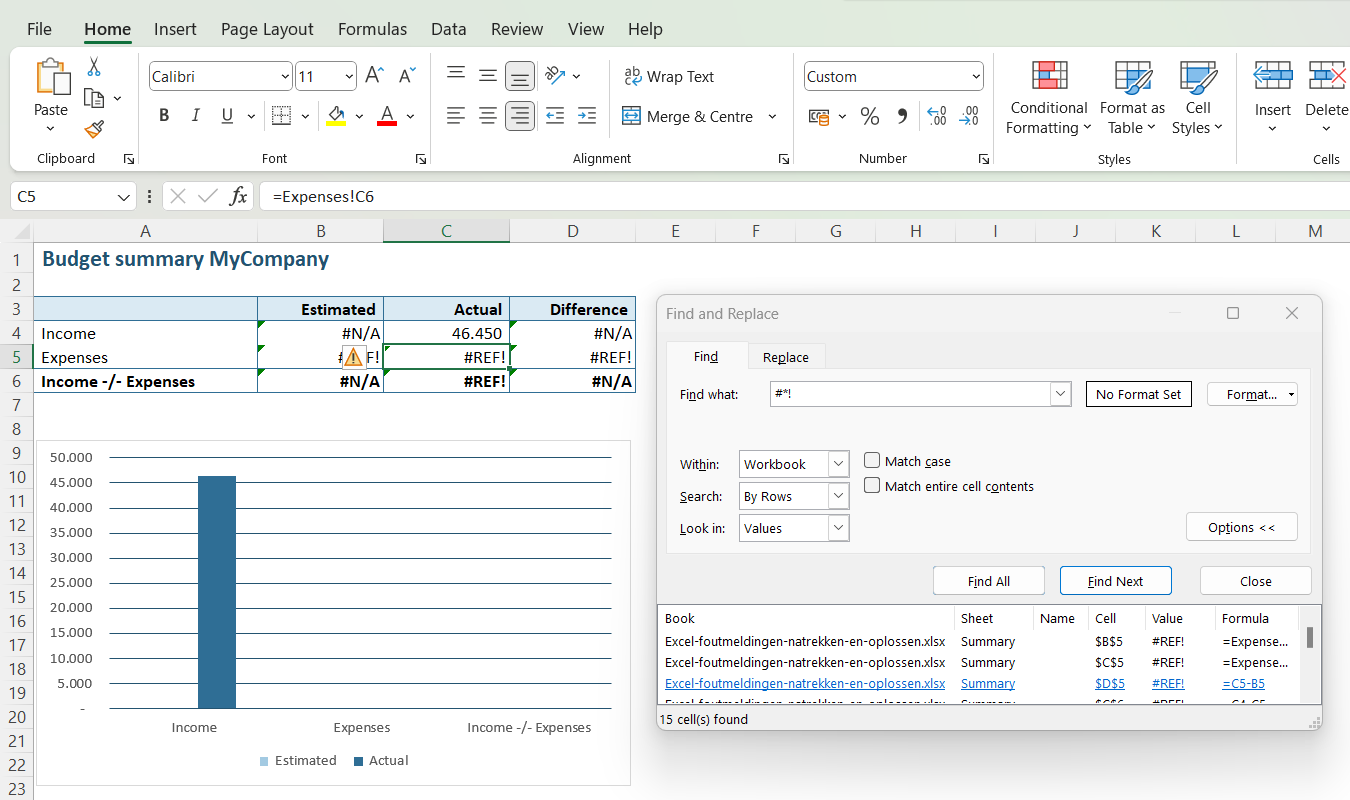
Excel now automatically selects the first error message found in the workbook so that you can evaluate it and correct it. Navigate through all individual error messages using the “Find Next” button in the search window, or by selecting the next error message from the overview in the search window.
Step 4: Search in formulas
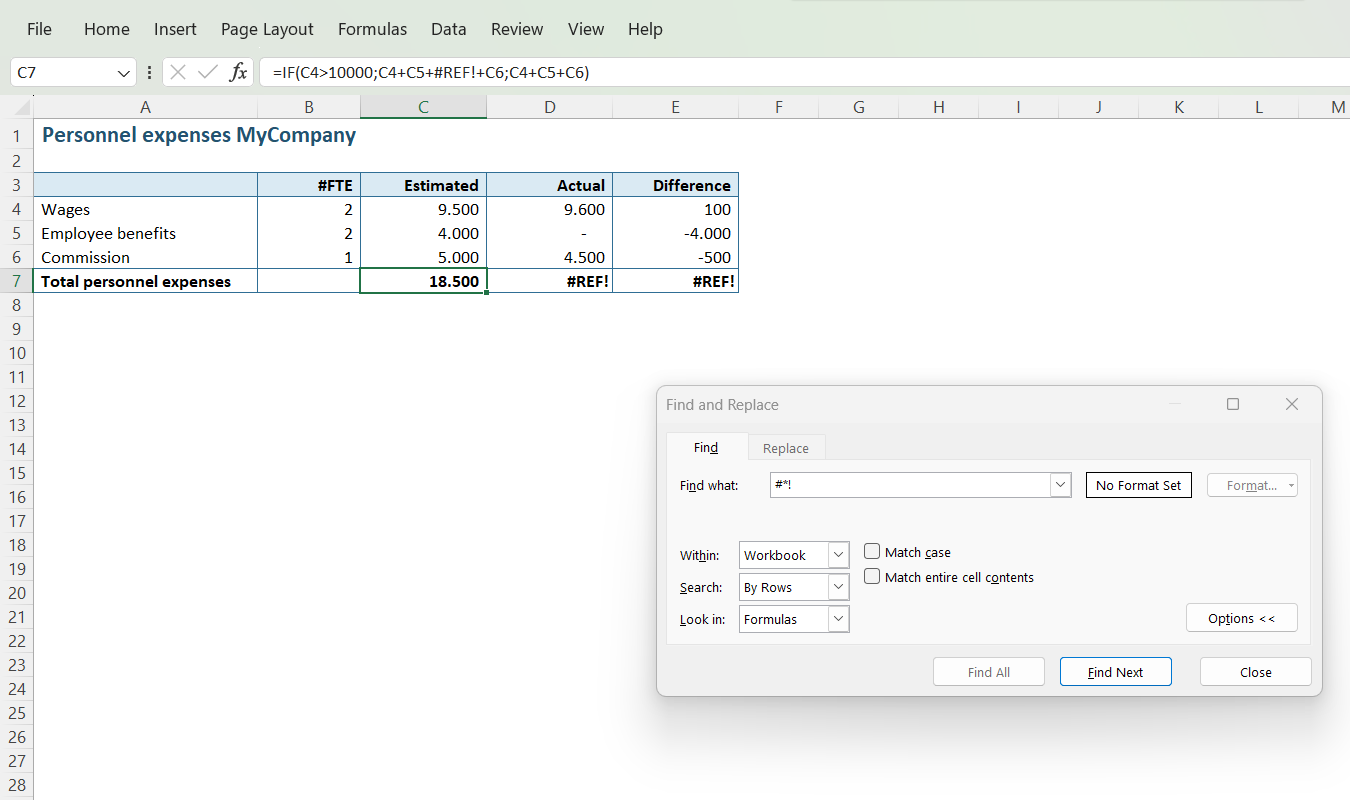
Next, adjust the “Look in” value in your search options to “Formulas” because in “Values,” you will only find the direct error messages and not the errors hidden in formulas. Like in the example below; the formula in C7 is =IF(C4>10000,C4+C5+#REF!+C6,C4+C5+C6) which displays the sum of the cells above neatly as a result: 18,500, because the value in C4 is less than 10,000. Error #REF! would only be found as a value if the value of cell C4 was greater than 10,000, but it’s present in the formula and thus needs resolution!
Step 5: Repeat all steps for #NAME? and #N/A
Finally, repeat all the above steps for #NAME? and for #N/A because these do not conform to our original search (#*!).
Lastly, focus on the #REF! errors. If you’ve resolved all other error messages, these will most likely have disappeared.
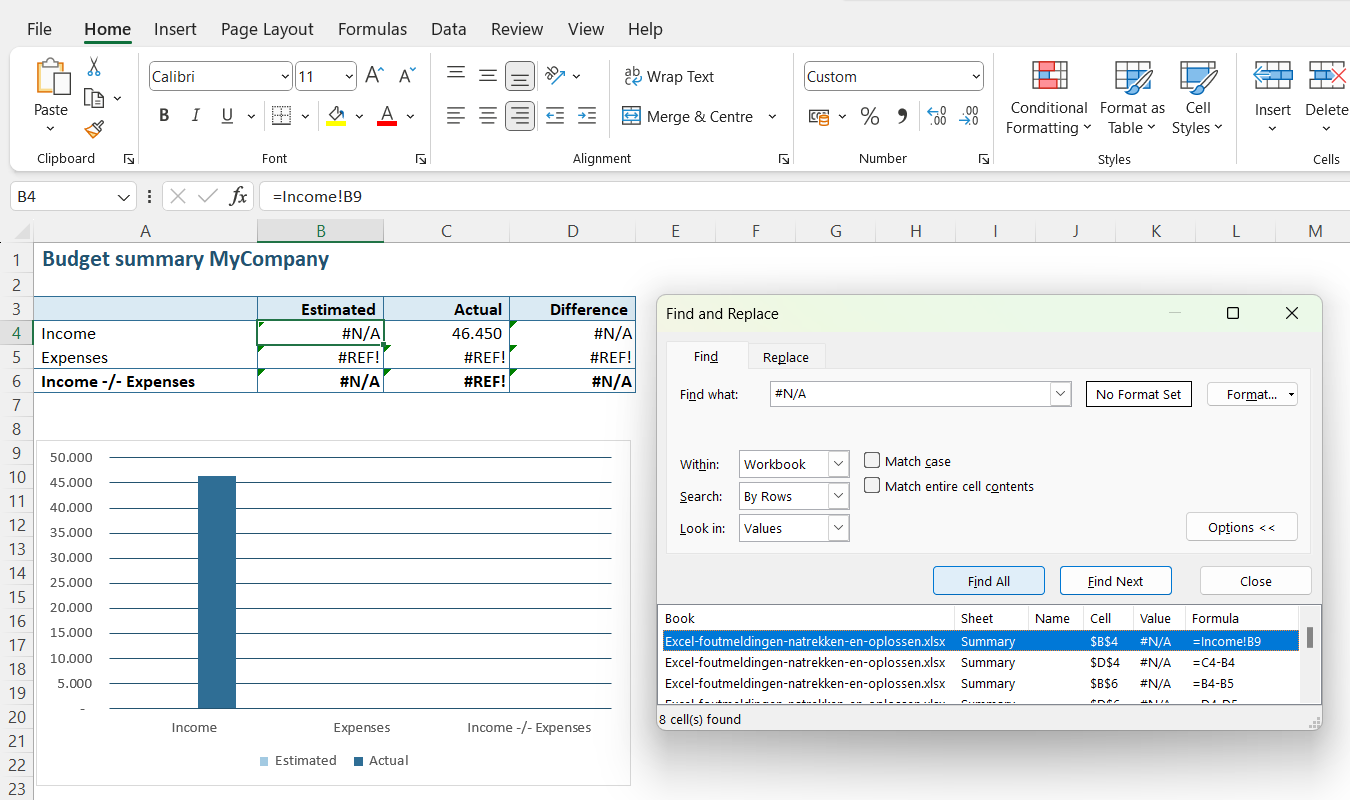
It’s evident that going through and resolving all error messages in this manner, especially in a large-scale model, is an extremely time-consuming task. “When you have a deadline to deliver a model to a client, it can cause quite a bit of stress! Use PerfectXL if you want to thoroughly and quickly deal with Excel error messages!”
Step-by-step with PerfectXL
Step 1: Open PerfectXL Risk Finder
With PerfectXL it really could not be easier. You will need the PerfectXL Risk Finder, you can access that either directly or through the PerfectXL Add-in.
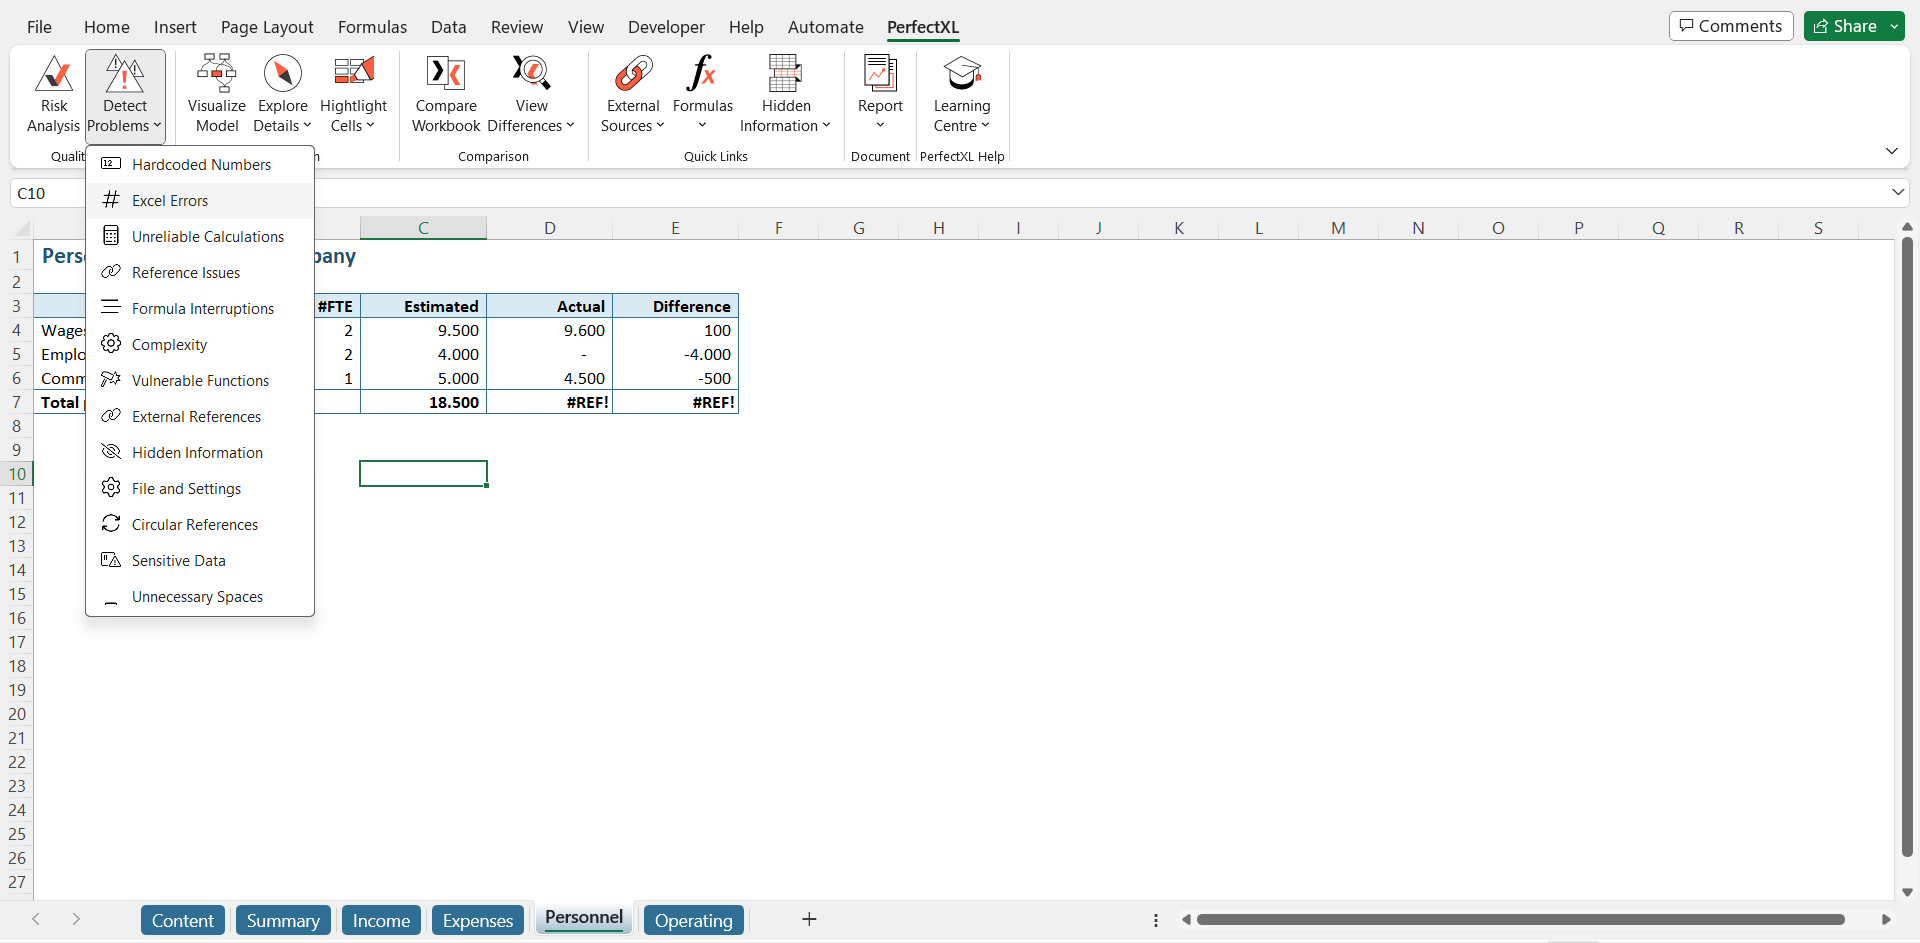
In the add-in just navigate to “Detect Problems,” and select (you guessed it) “Excel Errors.”
Step 2: Distinguish between error messages and references to error messages
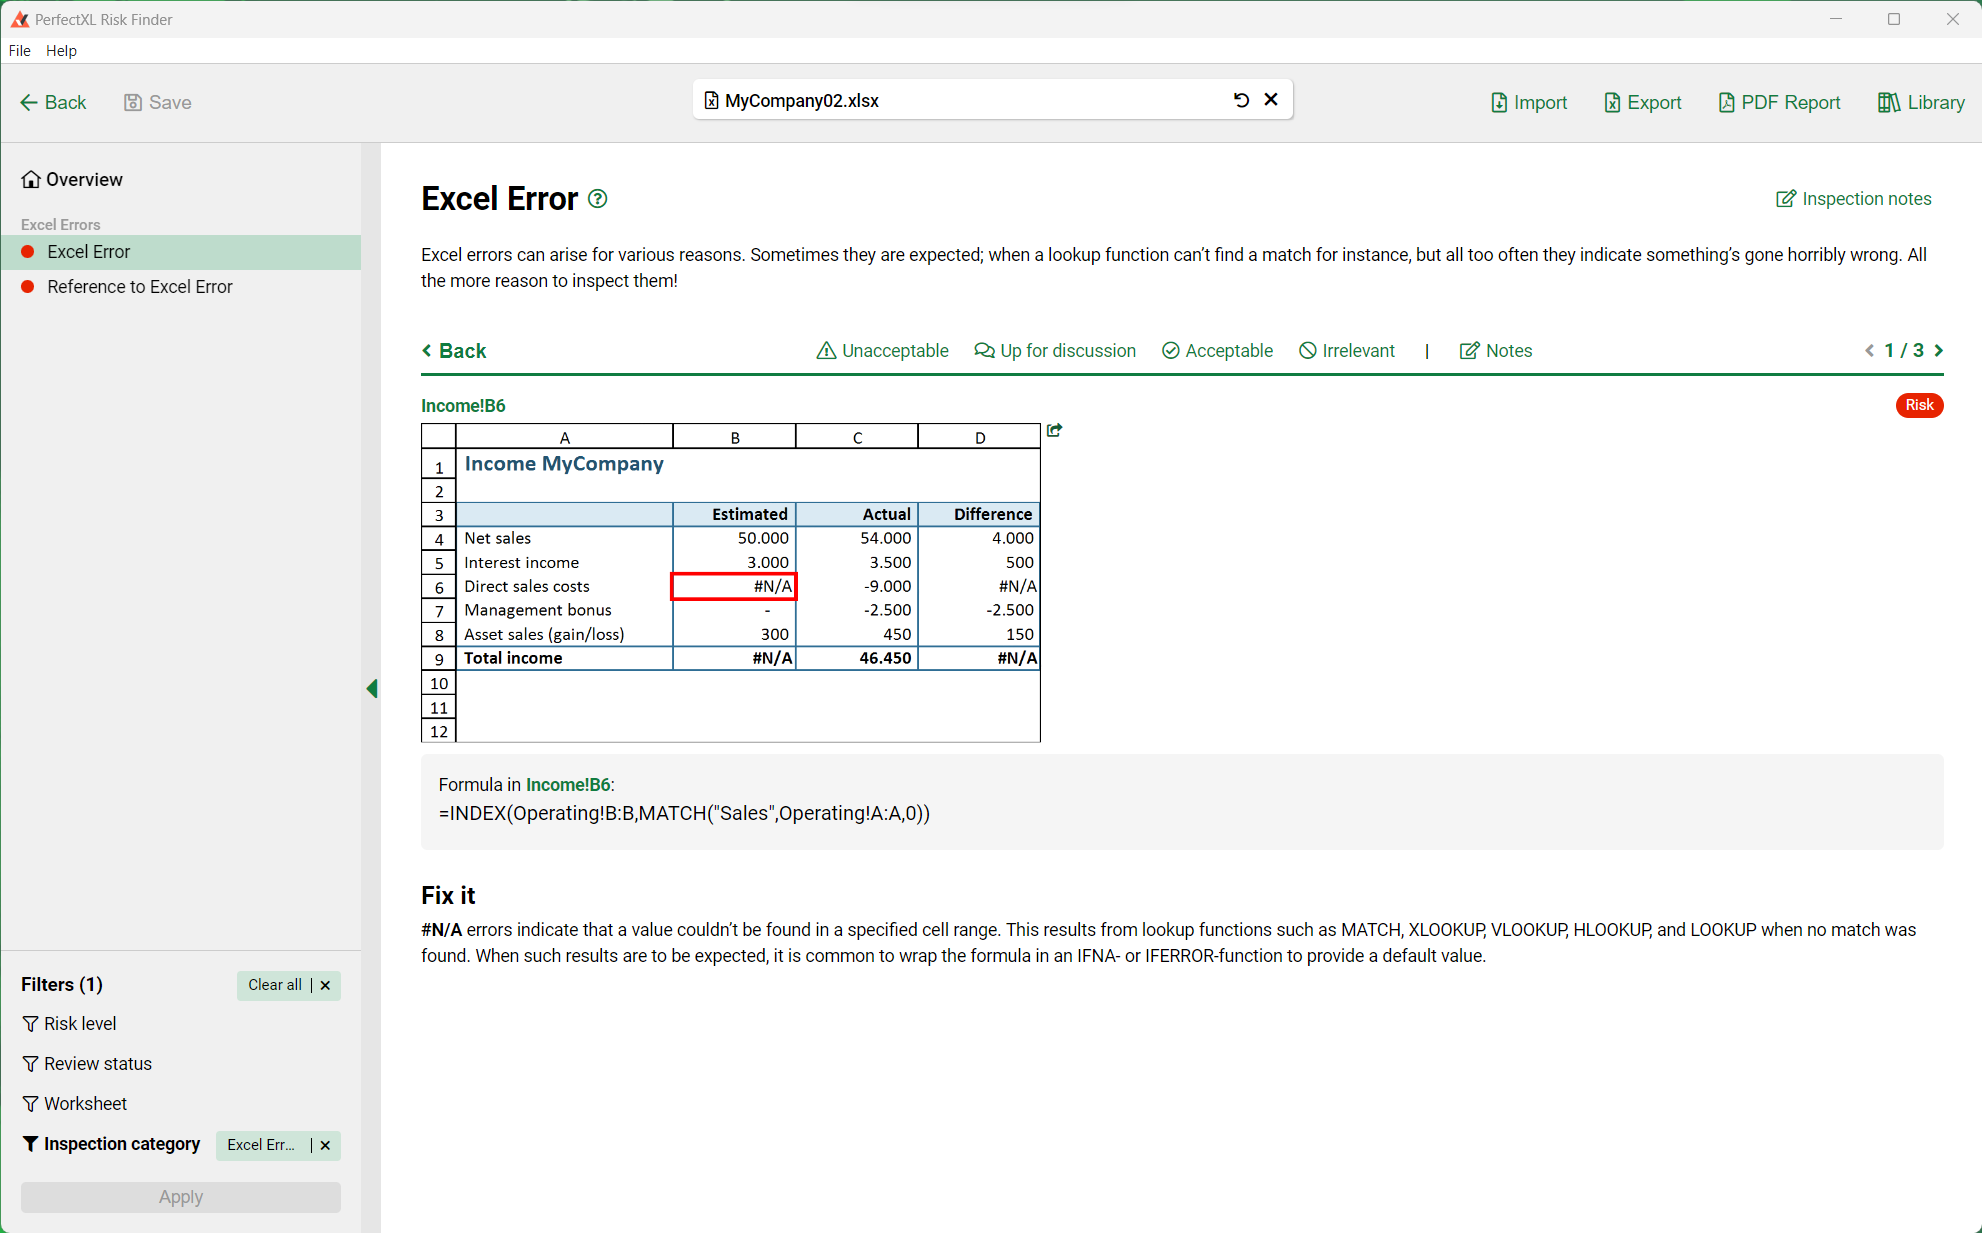
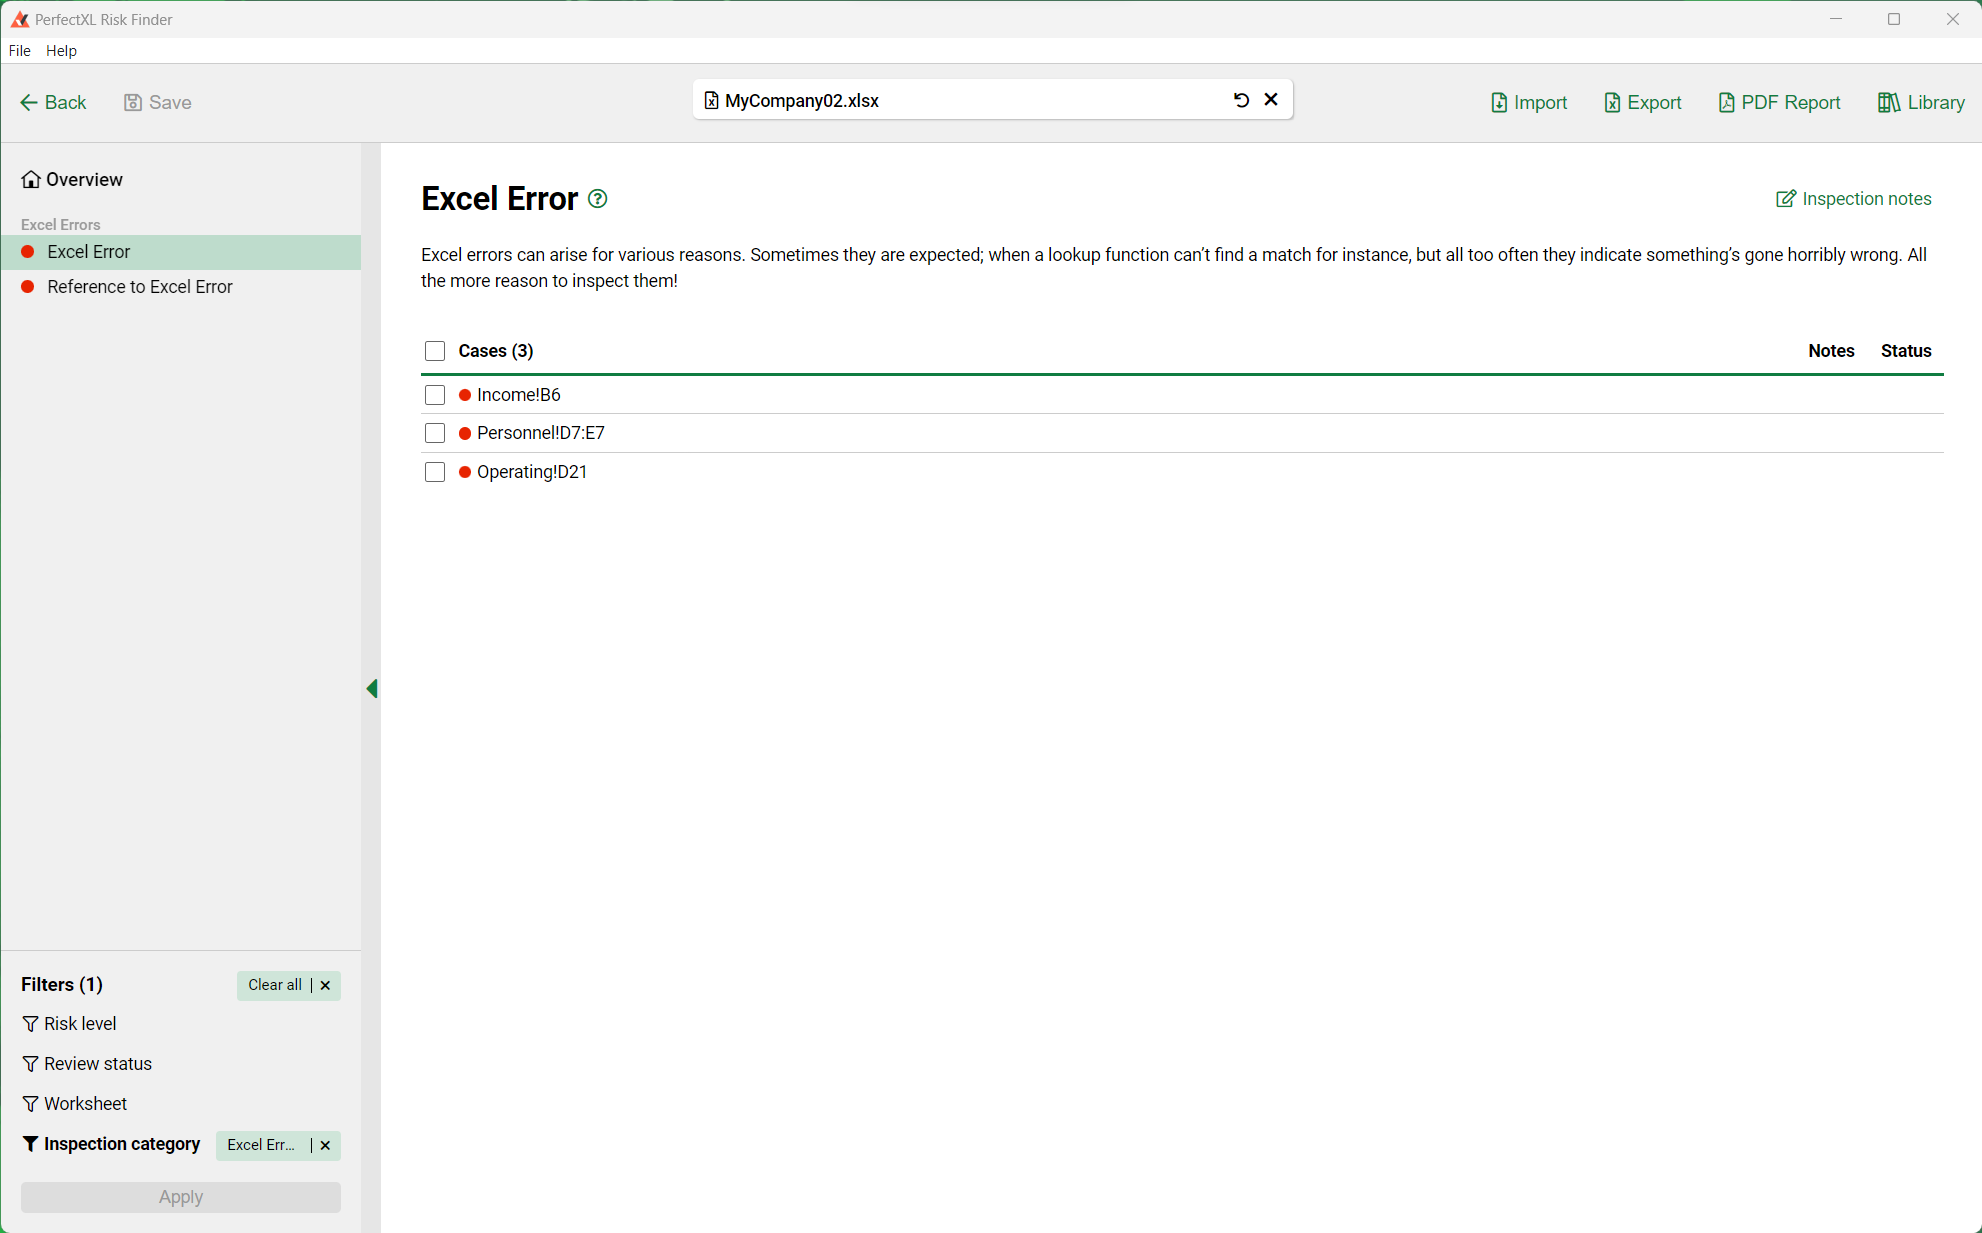
In PerfectXL Risk Finder in the menu on the left you will see that there are two categories of Excel Error: Excel Errors and References to Excel Errors. This is great, because if you just fix the Excel errors, then all references to the errors will also be solved. A great advantage as compared with the above method in native Excel.
The Risk Finder has already selected the Excel Error category, and you will see a list of all cell locations containing Excel errors.
Step 3: Resolve
You can click on one of these cases to get more context. When you select a case, you will see a screenshot of your Excel model, the formula causing the error, and some additional context on how to resolve the issue. You can click on the screenshot to jump directly to that error in your Excel model and resolve the issue in a fraction of the time you would need without PerfectXL.
