

Double-check model adjustments
Concentrating for several hours is challenging, and mistakes can happen. After working on a model for extended periods, it’s beneficial to scan the quality of your work. You can use PerfectXL to compare the previous version of your model with the new one and ensure that only necessary changes have been made. You can also check whether or not you have mistakenly introduced unnecessary risks.
- Download sample file A and sample file B to follow the steps.
- Already working with PerfectXL? Then jump to the solution with PerfectXL.

Step-by-step without PerfectXL
Checking changes manually
Checking for changes in a model manually can be a time consuming and challenging process. Even when done efficiently there is a considerable time commitment and the chance that a mistake is made or a change is missed is still relatively high.
That being said, here are a few things you can try.
Step 1: Compare with a formula
You can set up a simple control formula on core values like this: =IF(A1=[Version1.xlsm]Tab1!A1, “Yes”, “No”). If you build enough of these checks into the right places you can see which values have been affected by changes in the model.
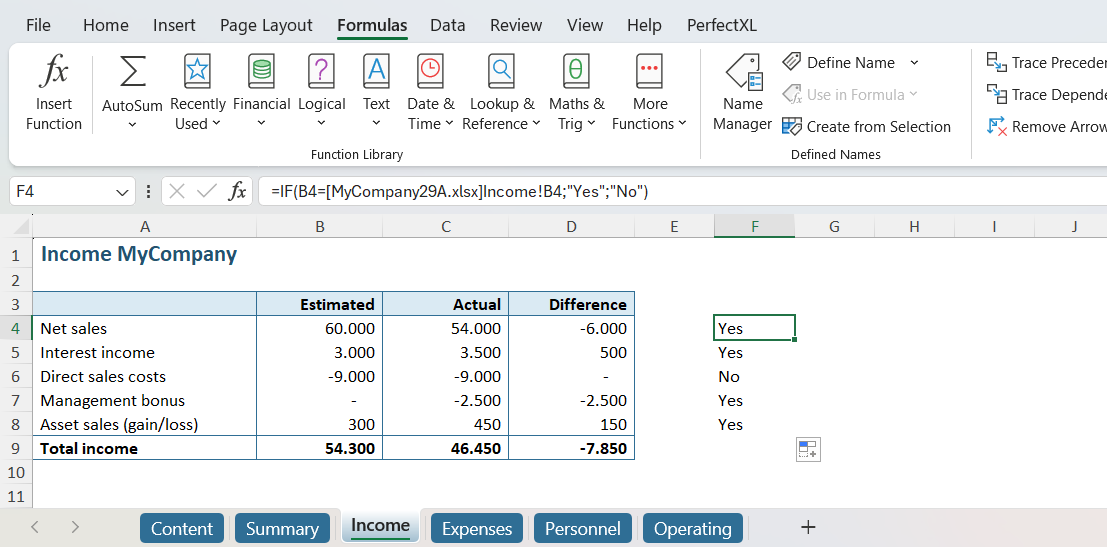
You could even do this process in a separate Excel model that just refers to both versions and you can get a relatively comprehensive difference overview.
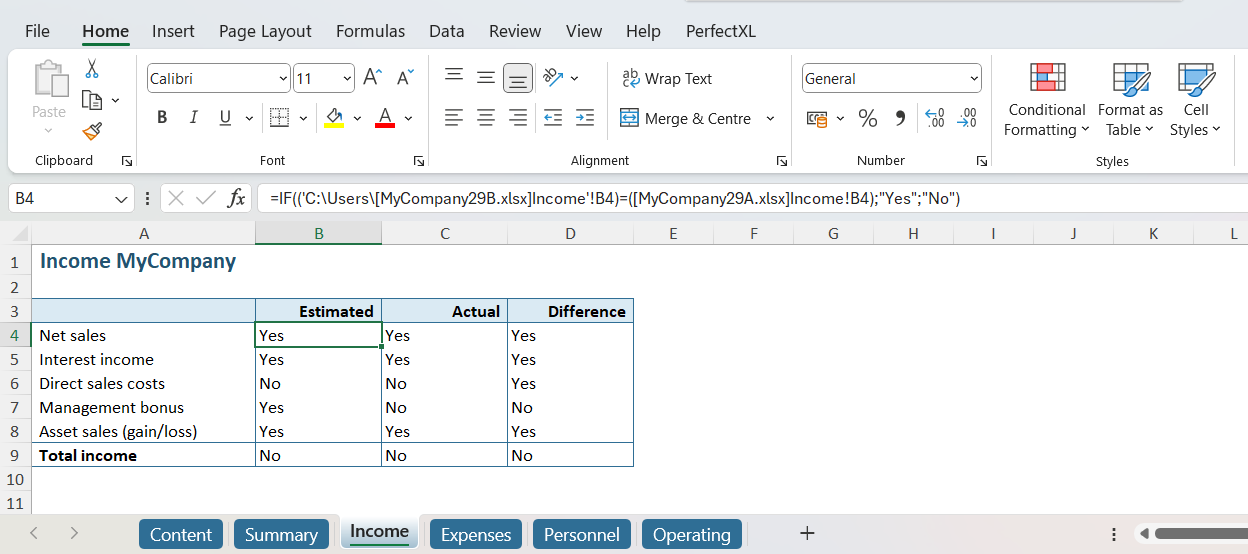
The issue with this approach is that an end total change could mean a formula somewhere changed, or your data changed, or the source was updated. It doesn’t actually pinpoint what has changed in the model, also if 2 different formulas give the same output the check will say nothing has changed, when in reality something did change, just not a value.
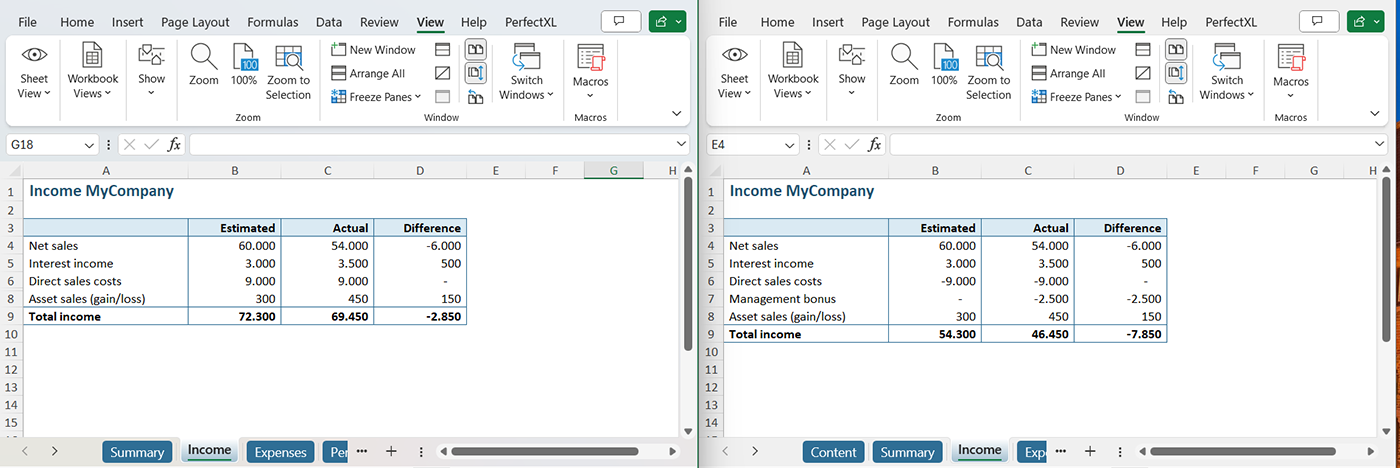
Step 2: Side-by-side
As straightforward as it may sound, you can open two files side by side and visually look for changes. This is never going to catch everything but is really helpful with spotting structure/big changes like row inserts or data that wasn’t there at all before. Excel has features to help with this called “view side by side” and “synchronous scrolling.”
In the ribbon navigate to “View” and then select “view side by side” this should automatically activate “synchronous scrolling.”

Step 3: Compare with Microsoft Word
While we wouldn’t recommend this approach, some users will copy the contents of their Excel models into word and then use the built in compare feature that Word offers to see what has changed between versions. This is a very minimalist comparison that will be difficult to read, but if you want to do it without installing anything new or using a 3rd party this may be a solution for you.
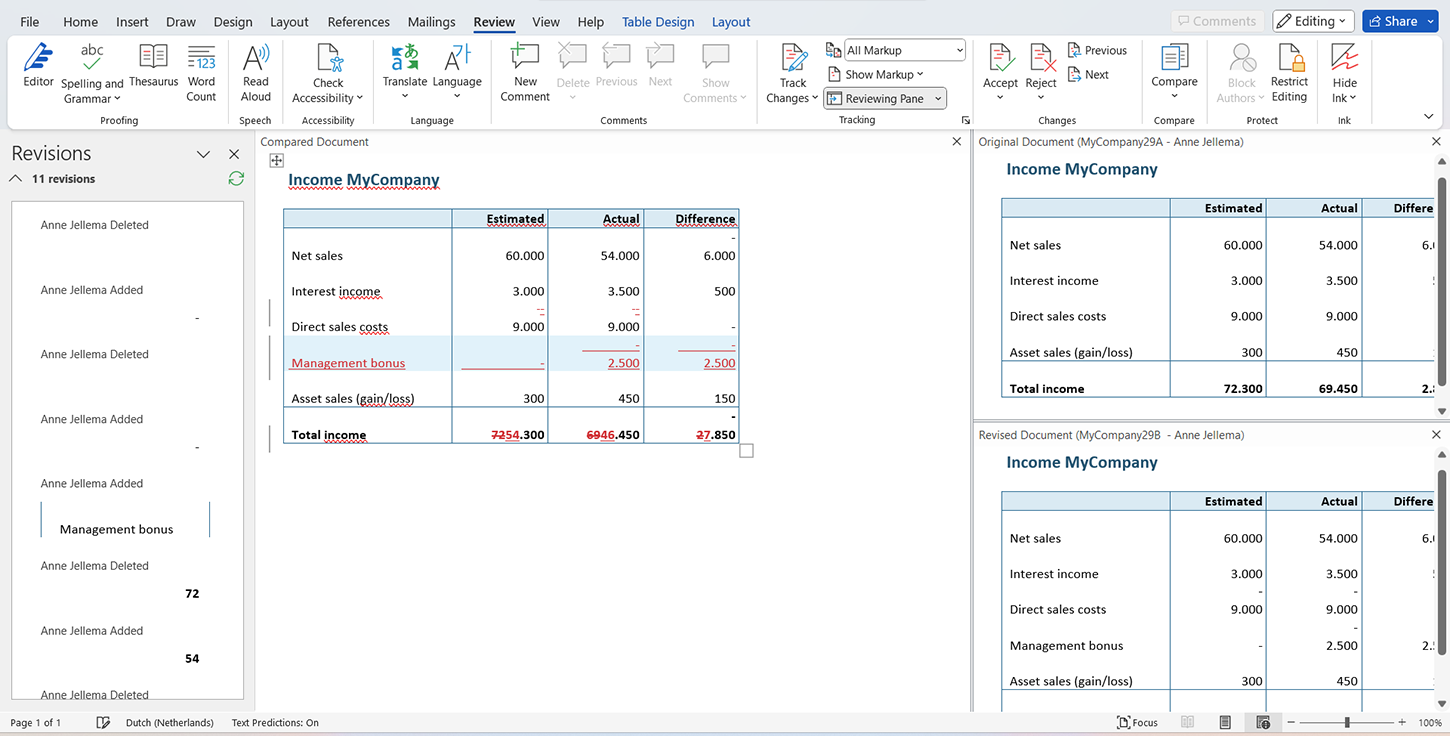
Again we don’t recommend it, but it could work.
Conclusion
These are genuinely the best ways to Compare models if you are not willing to use 3rd party solutions, but software like PerfectXL Compare will make this process so much easier!
Step-by-step with PerfectXL
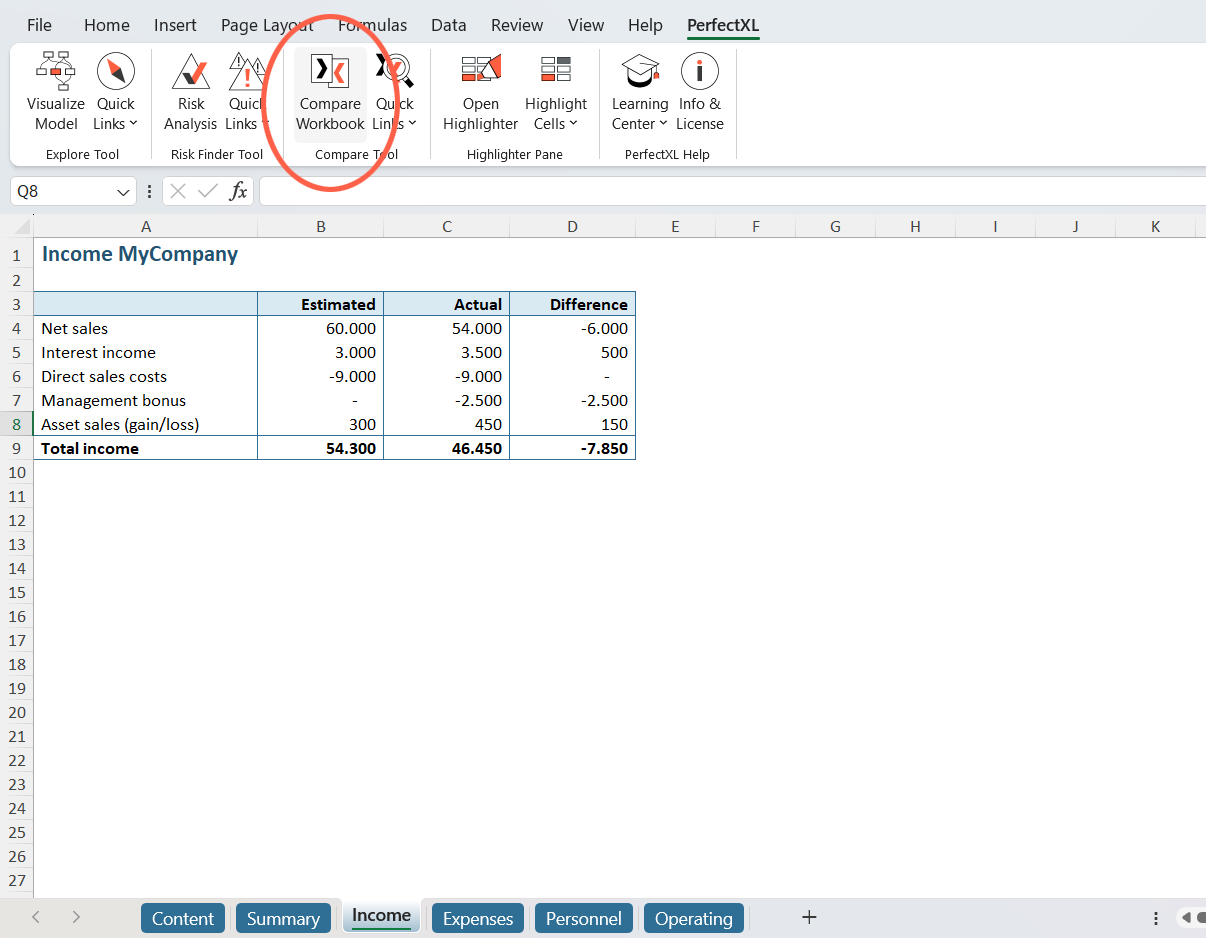
Step 1: Open both files in PerfectXL Compare
If you have both versions of the file open, navigate to the PerfectXL tab in the ribbon of each file and click “Compare Workbook.” If you don’t have the files open yet you can also just open the PerfectXL Compare tool directly and drag the files to the tool.
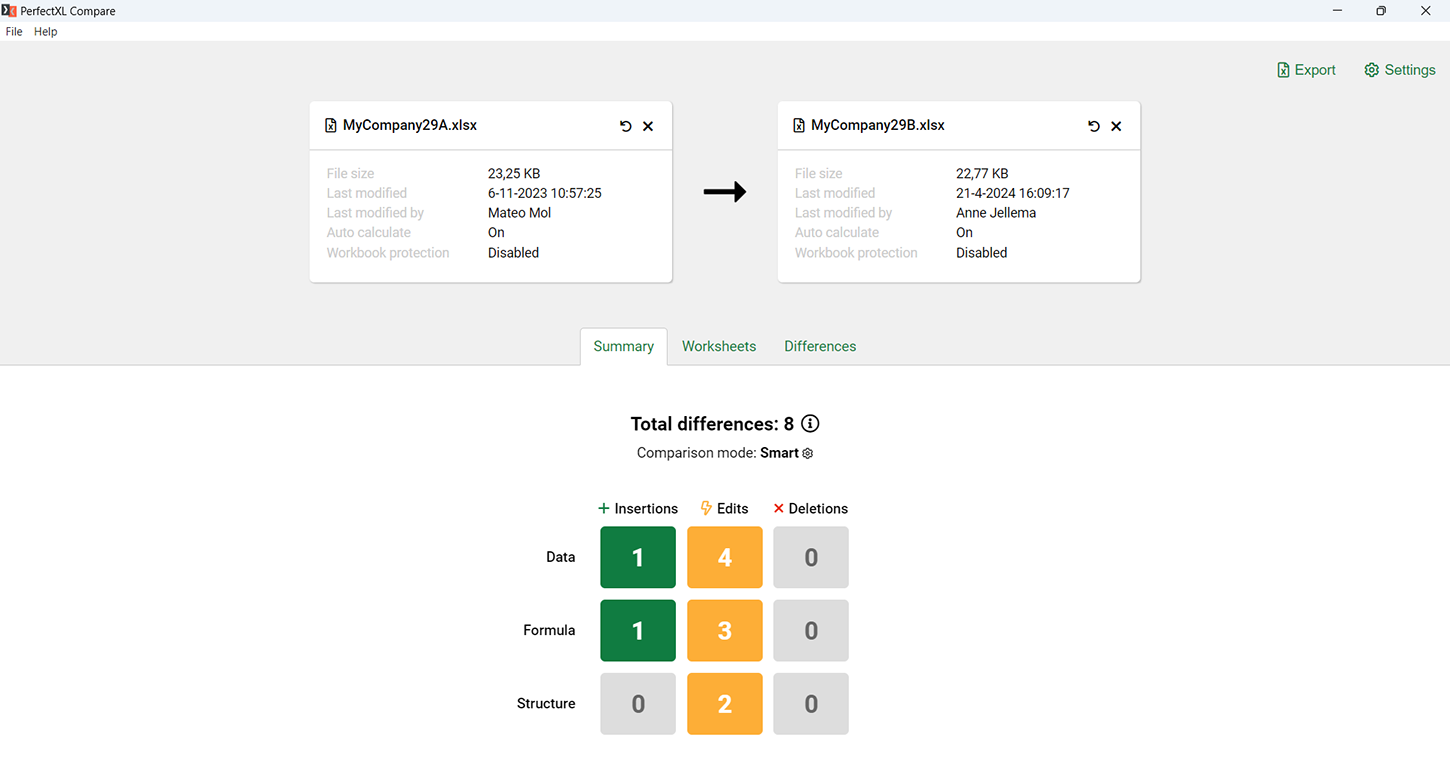
Step 2: Check the summary for unexpected changes
The analysis starts with a simple summary of changes, if a specific type of changes already catches your attention you can select it from the summary to jump directly into the details. For example, if you expect only data to have changed between two versions, a formula edit would be something you might want to have a look at. In this example nothing specific jumps to mind, let’s navigate directly to the worksheets tab in the tool.
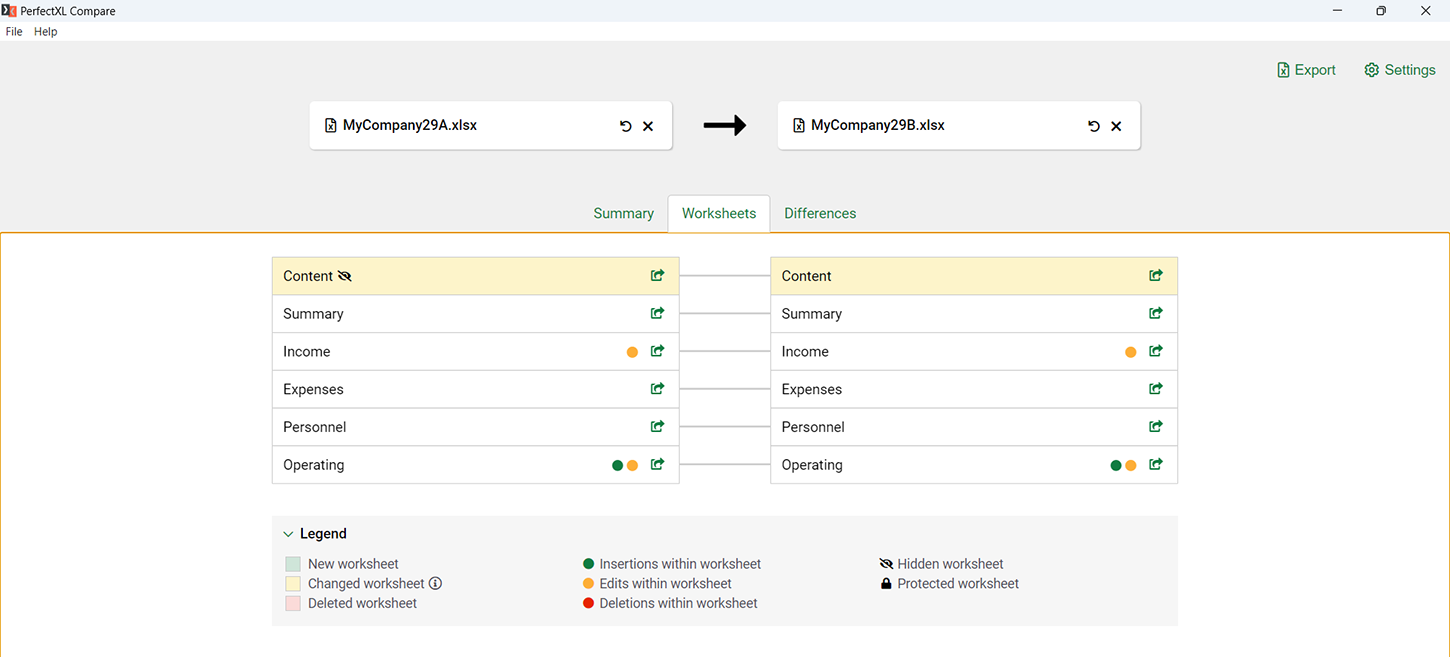
Step 3: Review changes per worksheet
Here we see the changes per worksheet, the colored circles represent types of changes in the worksheet. Highlighted worksheets (Content) have changed in name, protection status, or visibility (in this case visibility). This overview also shows us that three of the six sheets are unchanged, from here you can navigate to a specific sheet, or view all differences by navigating to the “Differences” tab. In this case let’s take a look at only the changes on the sheet “Operating.”
Step 4: Select worksheet for details
When we select a worksheet we navigate to the differences tab with changes filtered to only show changes on this specific worksheet. We see that there are some row insertions and some value adjustments as well as one formula change. We can select that change specifically to get more details.

Step 5: Reviews details per adjustment
It looks like there was a hardcoded “30” in version A of the model which has been removed in version “B.” We could also use the green arrows on the right side to navigate directly to that spot in our file, but the change seems quite straightforward in this case.

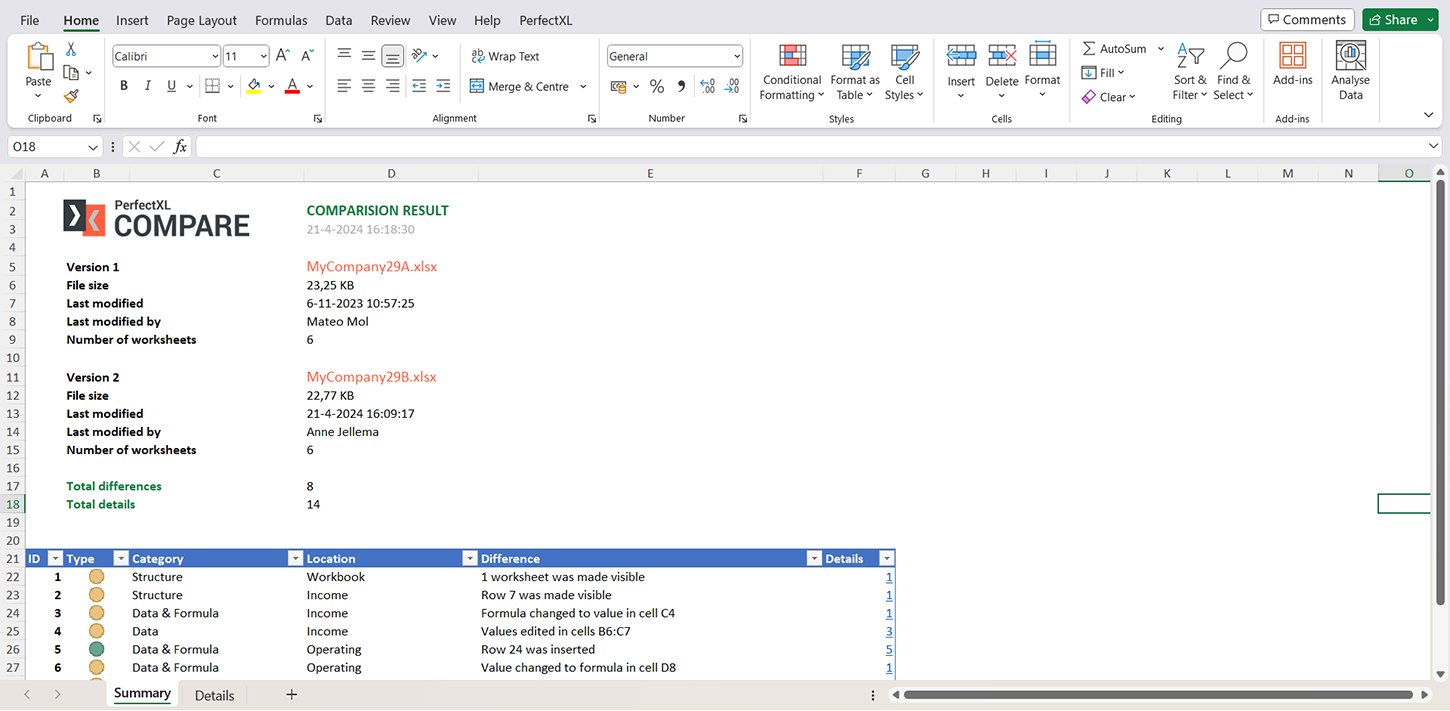
Step 6: Generate a report
Once I’ve reviewed the changes I can choose to export the differences to Excel by clicking “Export” at the top right of the tool. This export could be used as a version log for a model you are managing, or as a way to communicate the changes with another party. In this way you’ve been able to see and review all changes to a model in a matter of minutes and also have documentation on what has changed between two versions.
Conclusion
PerfectXL Compare will save you a lot of time checking your progress and it will help you avoid mistakes due to long hours or lack of concentration.