

Organize and maintain version control
Unclear naming and lack of documentation often lead to questions and issues when changes occur. PerfectXL quickly highlights differences between two versions, ensuring you’re aware of modifications. You can export the report to maintain a record of all developments.
- Download sample file A and sample file B to follow the steps.
- Already working with PerfectXL? Then jump to the solution with PerfectXL.

Step-by-step without PerfectXL
Performing a quality check and making adjustments on the way
When you receive a model from a client or co-worker, you will first want to explore the file to get acquainted with it. While you’re at it, you will also perform a quality check and of course, make adjustments when and where you deem necessary for the quality and reliability of the file.
Step 1: Respond to notifications and pop-ups
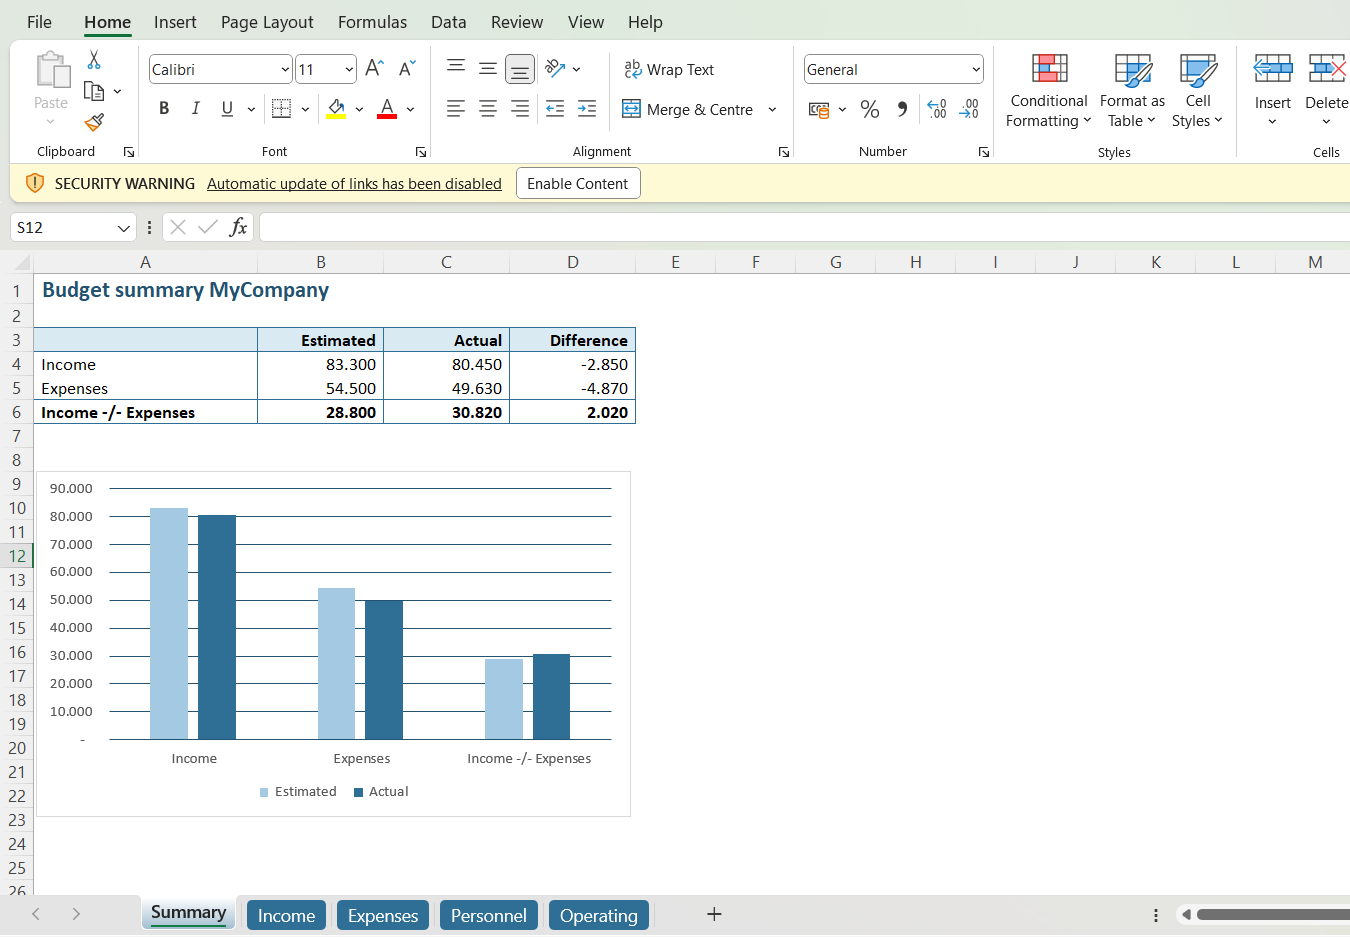
As soon as we open our test-file, we are confronted with a Security Warning in the yellow bar: Automatic update of links has been disabled. As a frequent Excel-user you’re probably familiar with this notification that indicates there is something wrong with a link in the file.
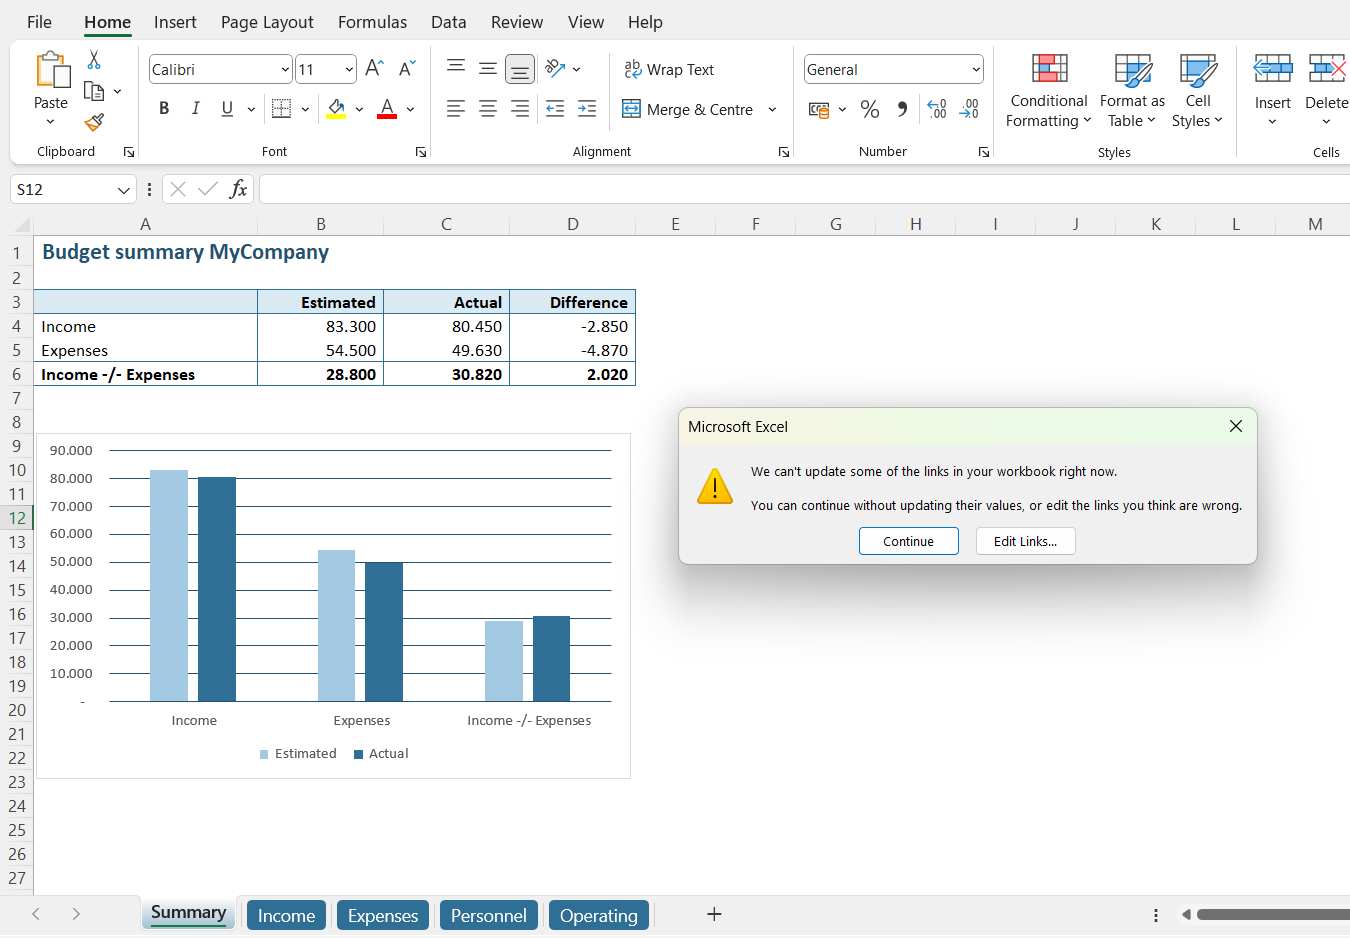
When we click the ‘Enable Content’ button, a pop-up with pretty much the same notification appears:
Step 2: Investigate broken link
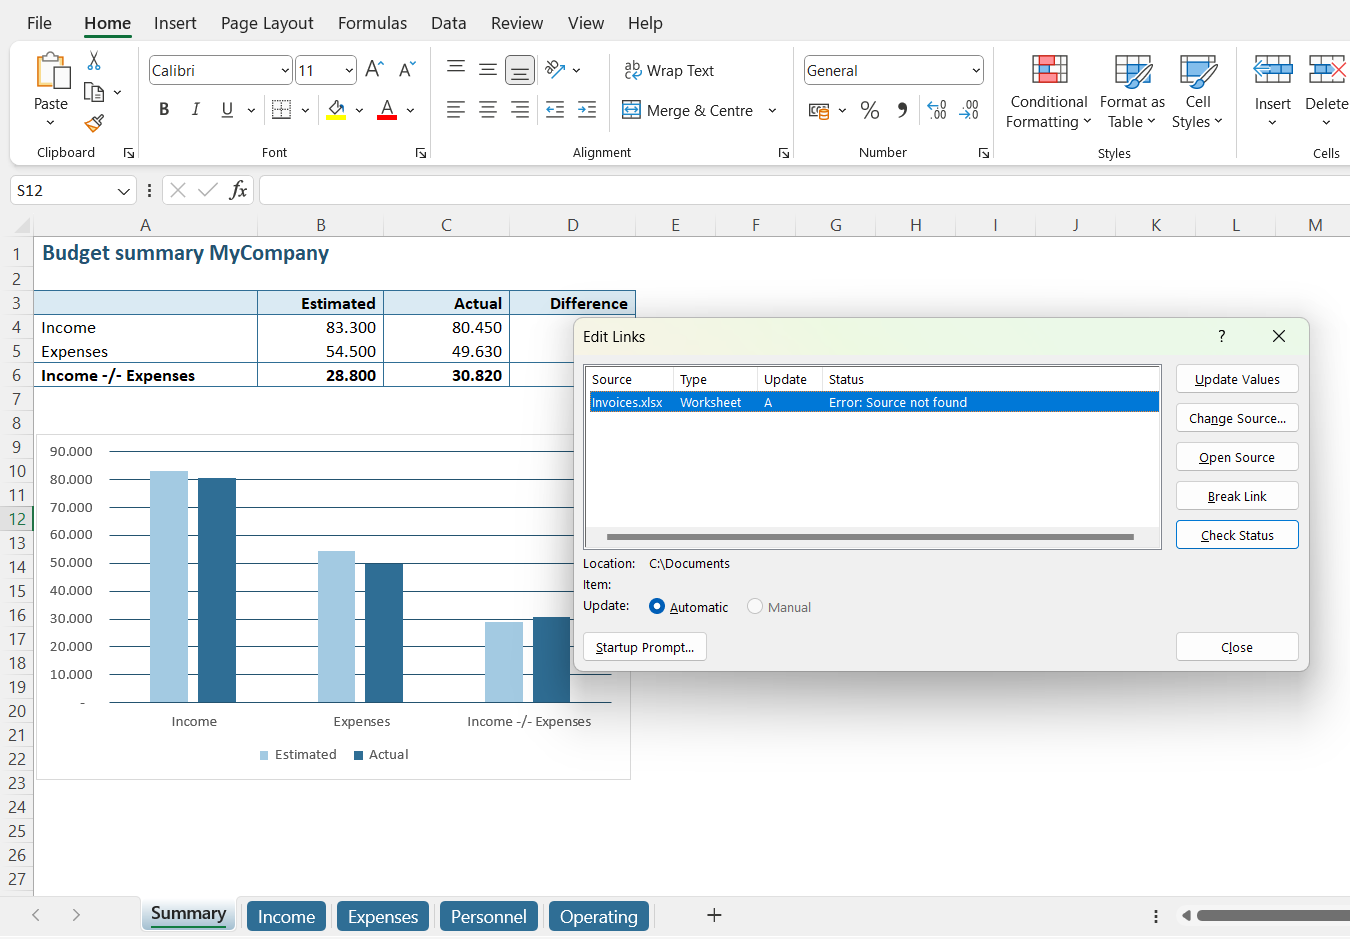
Clicking on ‘Edit Links’ allows us to investigate which link(s) this notification is referring to.
In the Edit Links window, we see a reference to Invoices.xlsx. This file is not available to us (maybe a client or co-worker didn’t provide it together with the model we’re working with), so it’s logical that the reference doesn’t work. The question is: where do we find this reference in this model? Let’s start searching!
Step 3: Locate the link
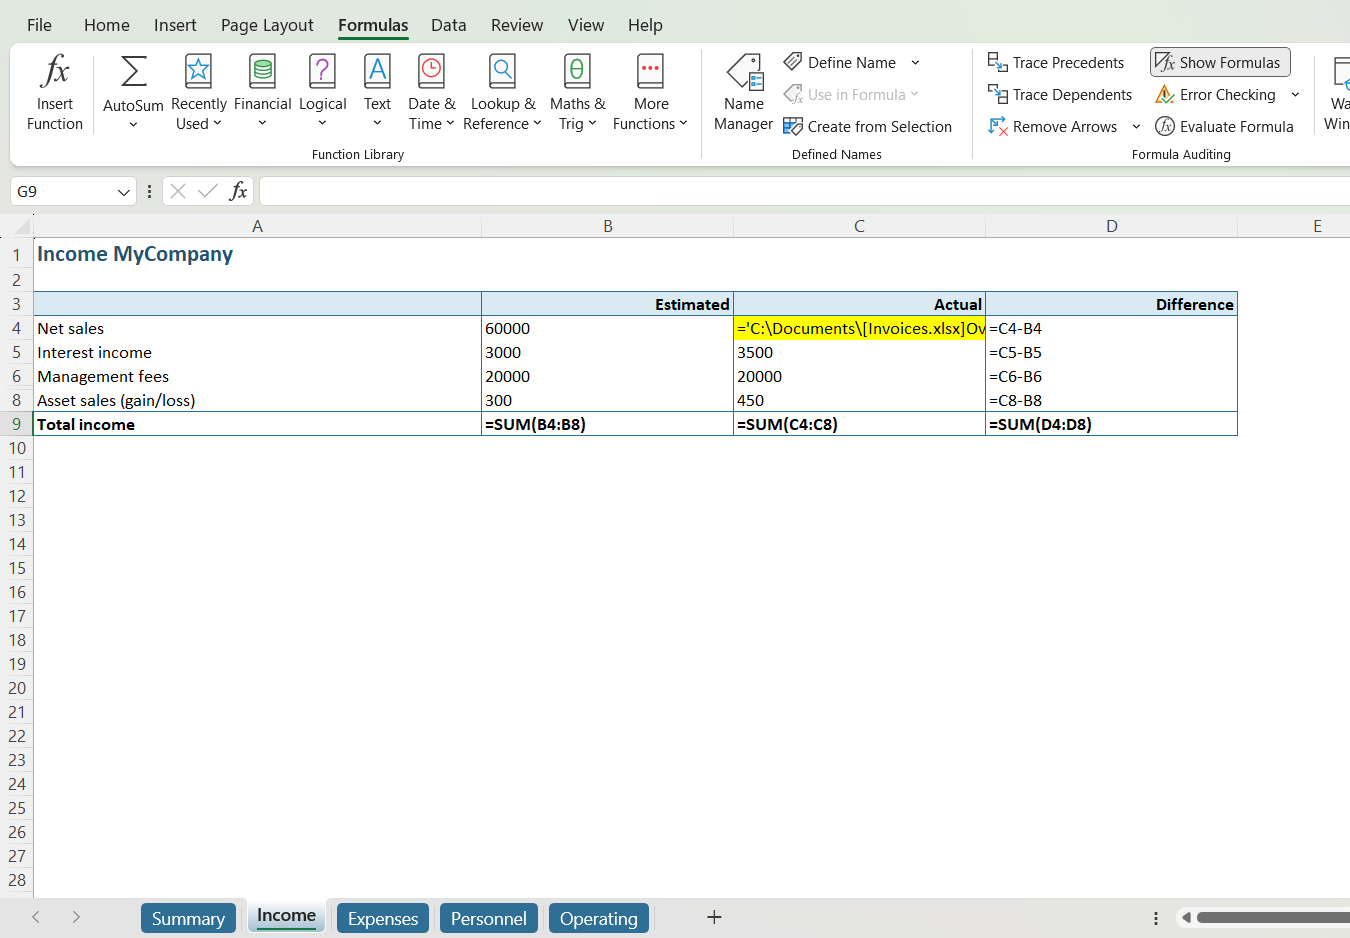
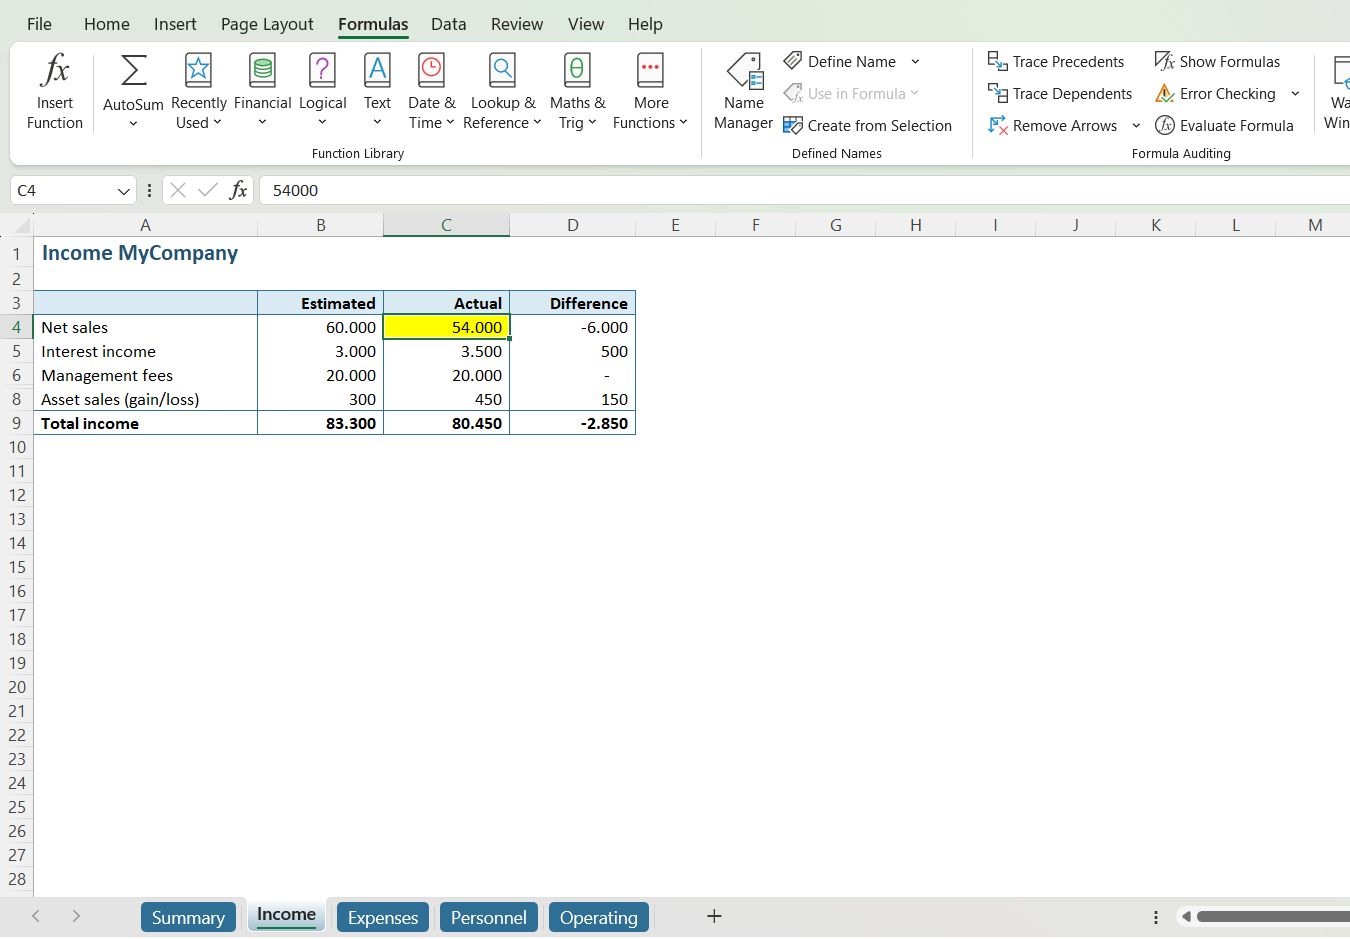
To find the external link in our model, we choose the option ‘Show Formulas’ under ‘Formulas’ in the main menu. In this mode, we visually inspect all cells in all tabs to find the link. Fortunately, the model we are using in this example is concise, so we quickly locate the link on the ‘Income’ tab in cell C4.
Step 4: Fix the issue
First, we undo ‘Show Formulas’ (by clicking it again) to rehide the formulas and reveal the values. The value is in cell C4 is 54,000. To get rid of the error message we replace the formula by its value: 54.000.
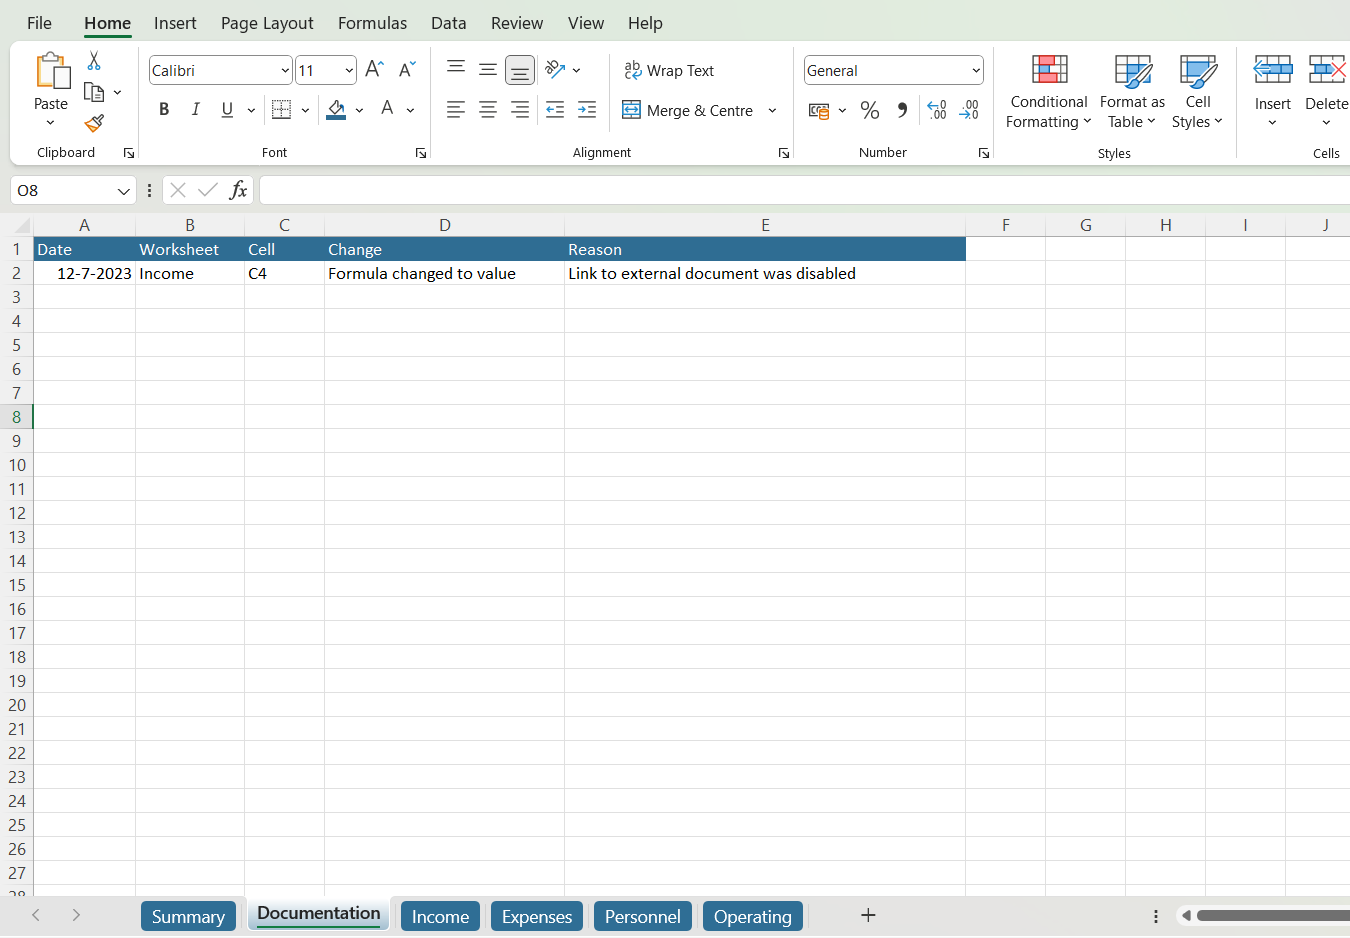
Step 5: Document the adjustment
It’s essential that we document this adjustment, because it’s not how our client or co-worker provided the model. We must be able to explain to the next user what we did and why. Therefore, we add a documentation tab where we will track all changes.
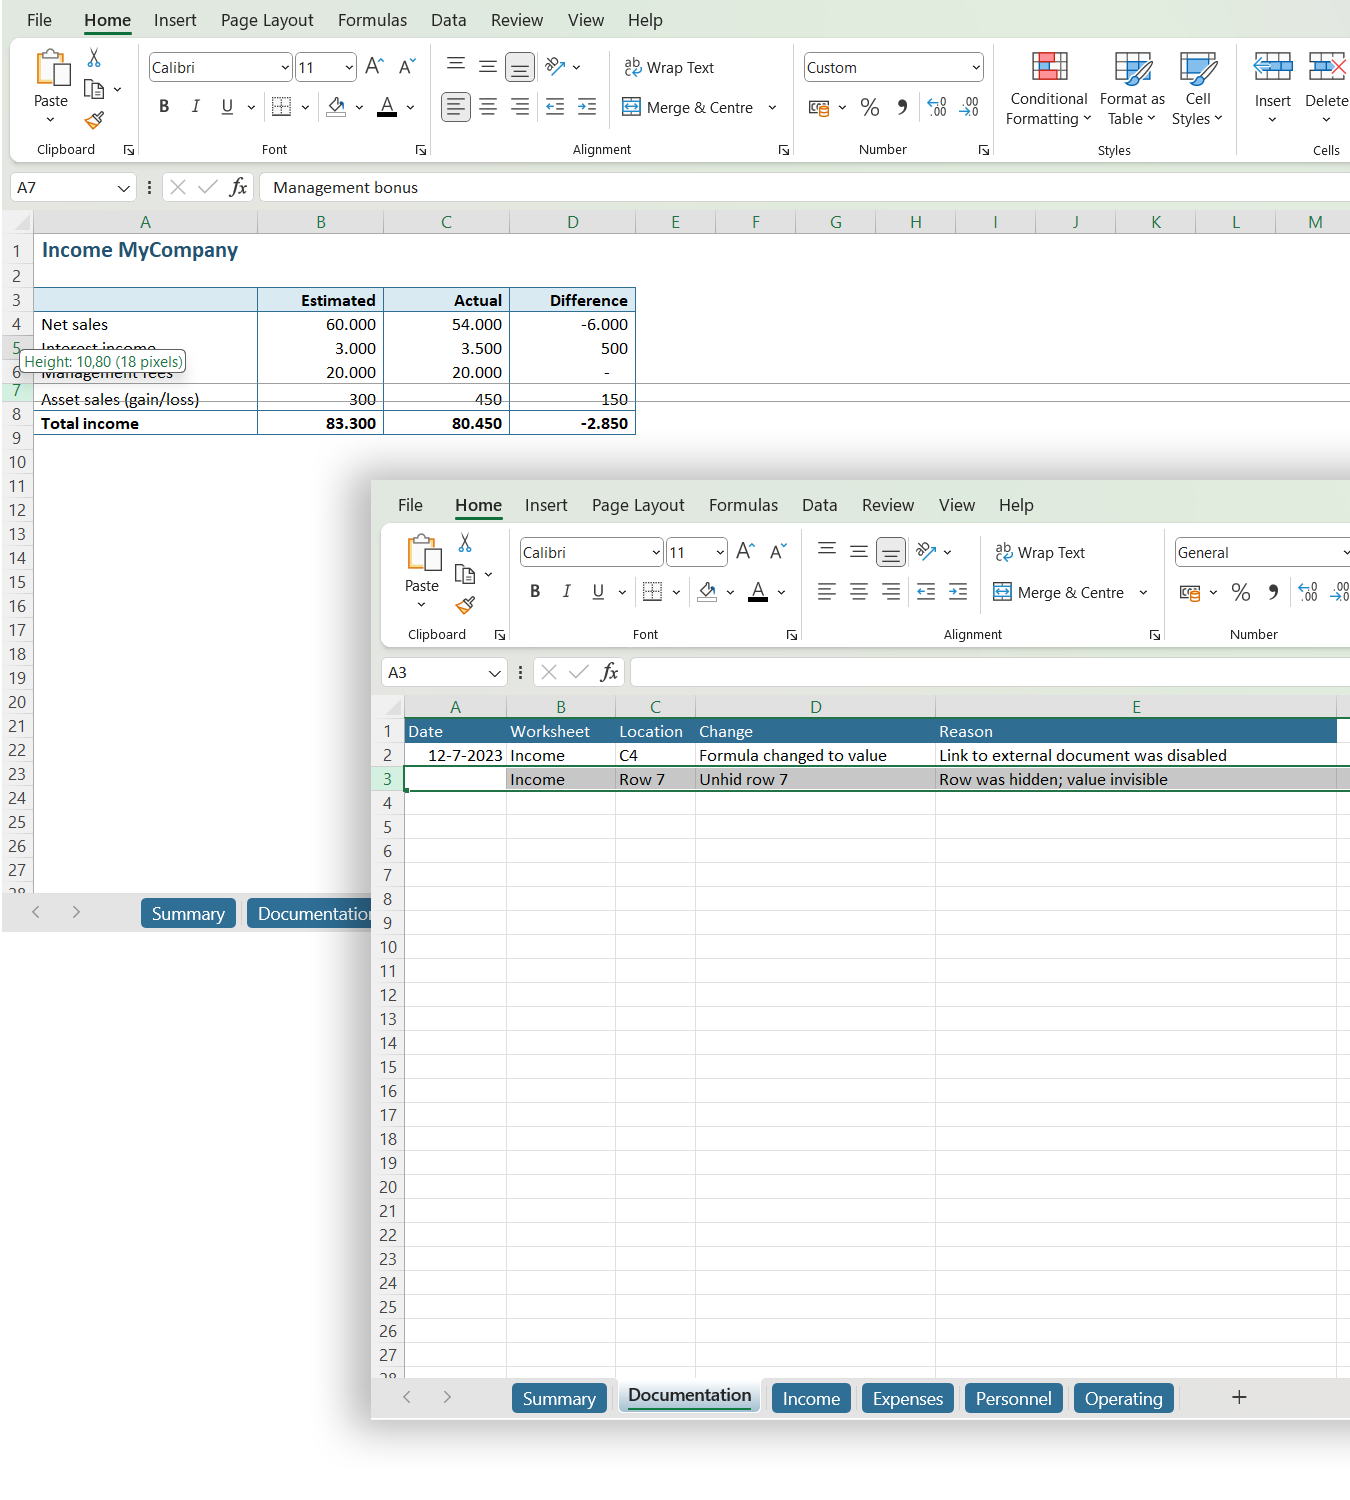
Step 6: Unhide hidden row
While we were working on the ‘Income’ tab, we noticed another issue by chance: row 6 is followed by row 8. This means that row 7 is hidden, and hidden information can pose a risk. In accordance with the PerfectXL Guidelines we prefer to make this row visible and this is another action that should be documented in our Documentation sheet, because this adjustment might be relevant at some point.
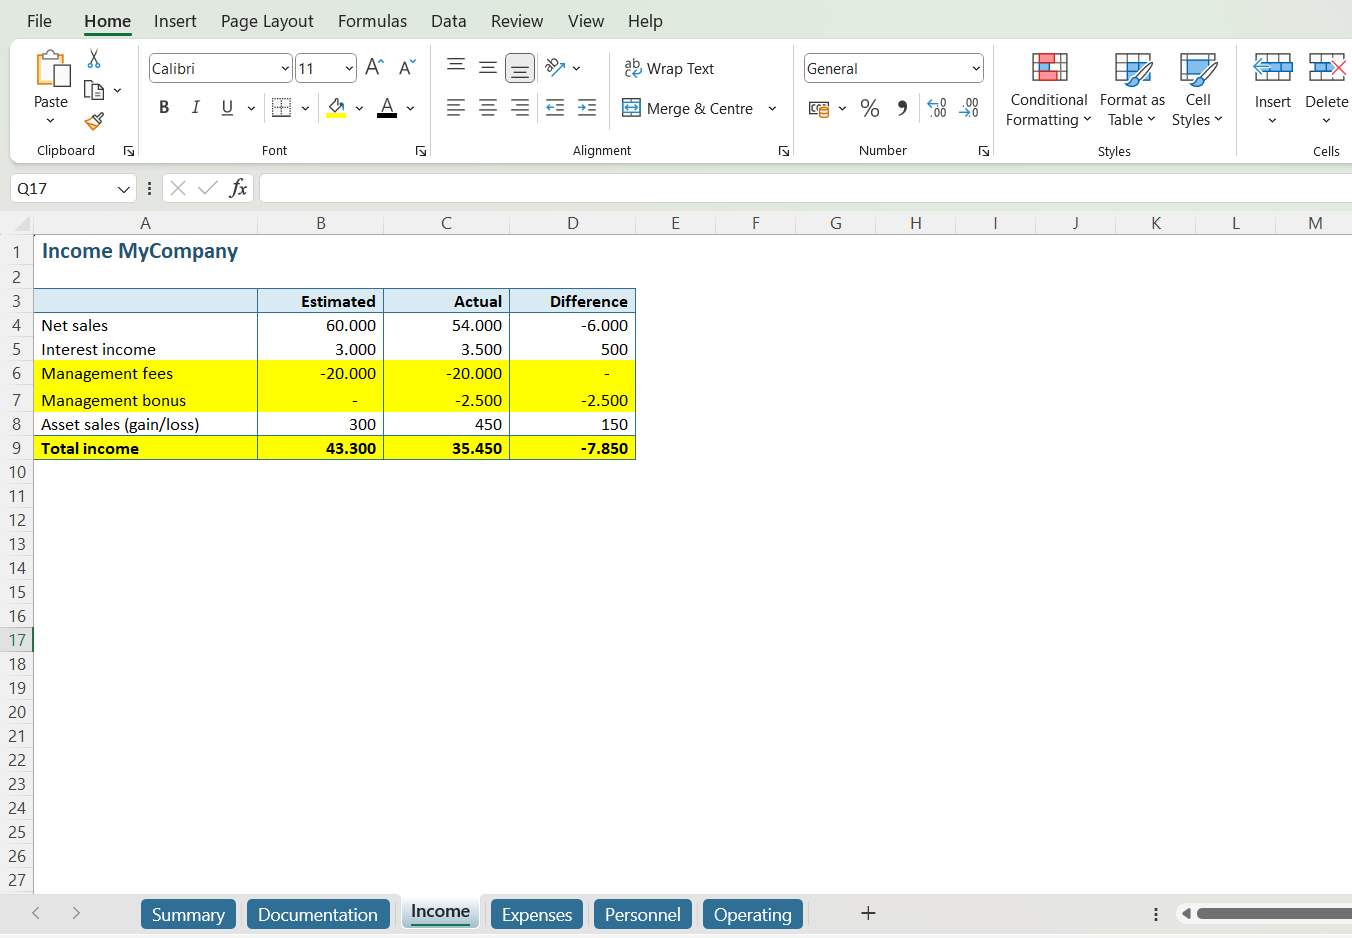
Step 7: Assess the data
Now, have a very conscientious look at the information in the table on the ‘Income’ tab for a minute. Have you noticed that the data in row 6 (‘Management fees’) and row 7 (‘Management bonus’) represent expenses instead of income? This means that the values in cell B6, C6 and C7 should be made negative to make any sense in this specific table.
These are also important adjustments to note down in our documentation sheet.
Note: The effect this action has on row 9, ‘Total income,’ is a consequence; it’s not necessary to document this as an adjustment.
Step 8: Check for other irregularities
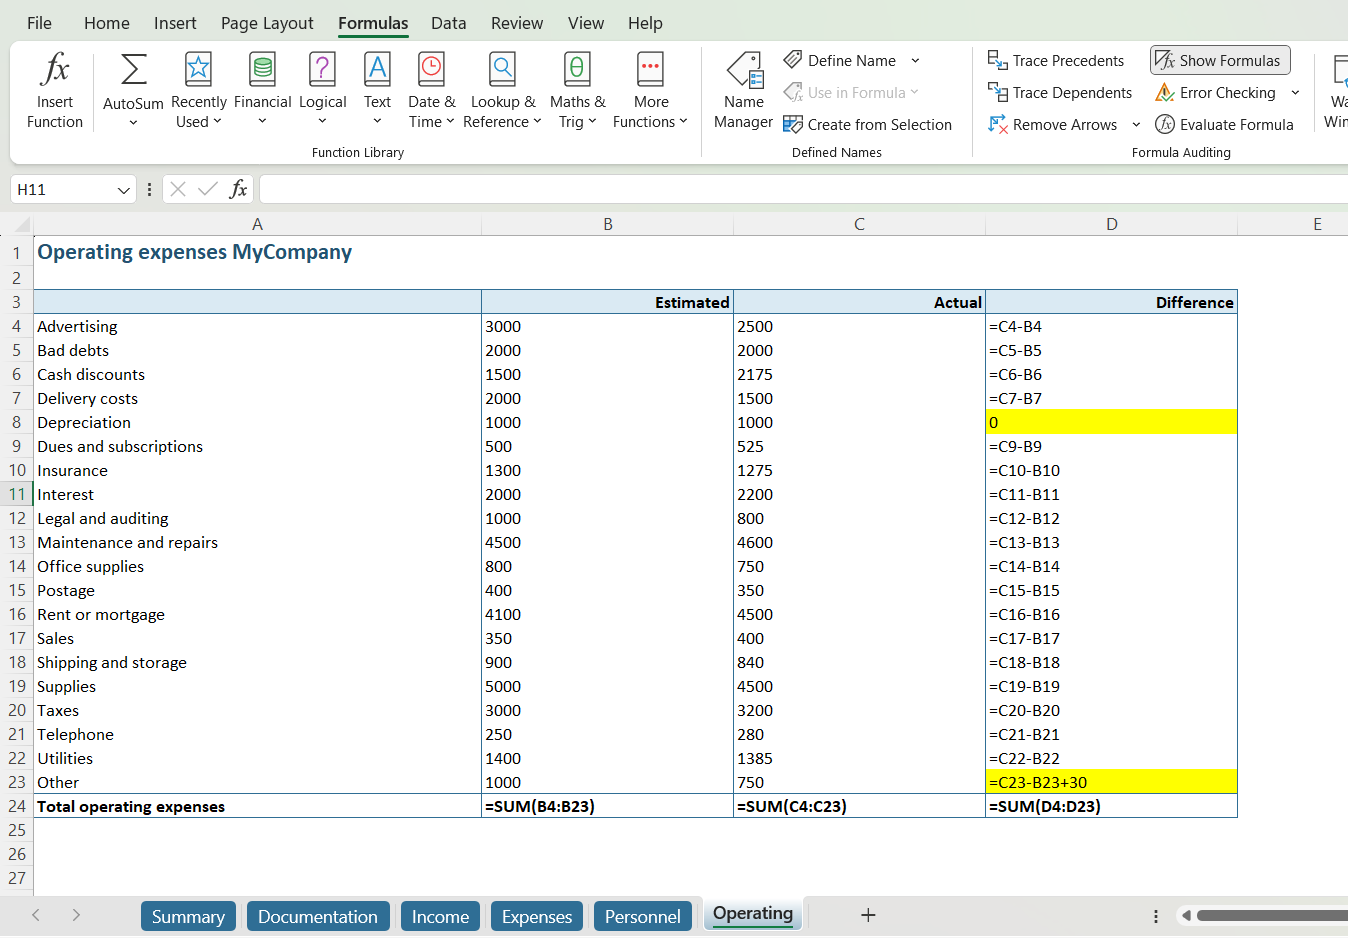
Let’s continue to check our model for irregularities and examine all tabs in ‘Show Formulas’ mode. On the ‘Operating’ tab, something catches our eye. In column D, there is a formula copied across much for the range (‘=C[x]-B[x]’), but we see two interruptions with the naked eye. Cell D8 contains no formula (but value ‘0’), and in cell D23, ‘+30’ has been added to the formula.
Step 9: Resolve detected issues
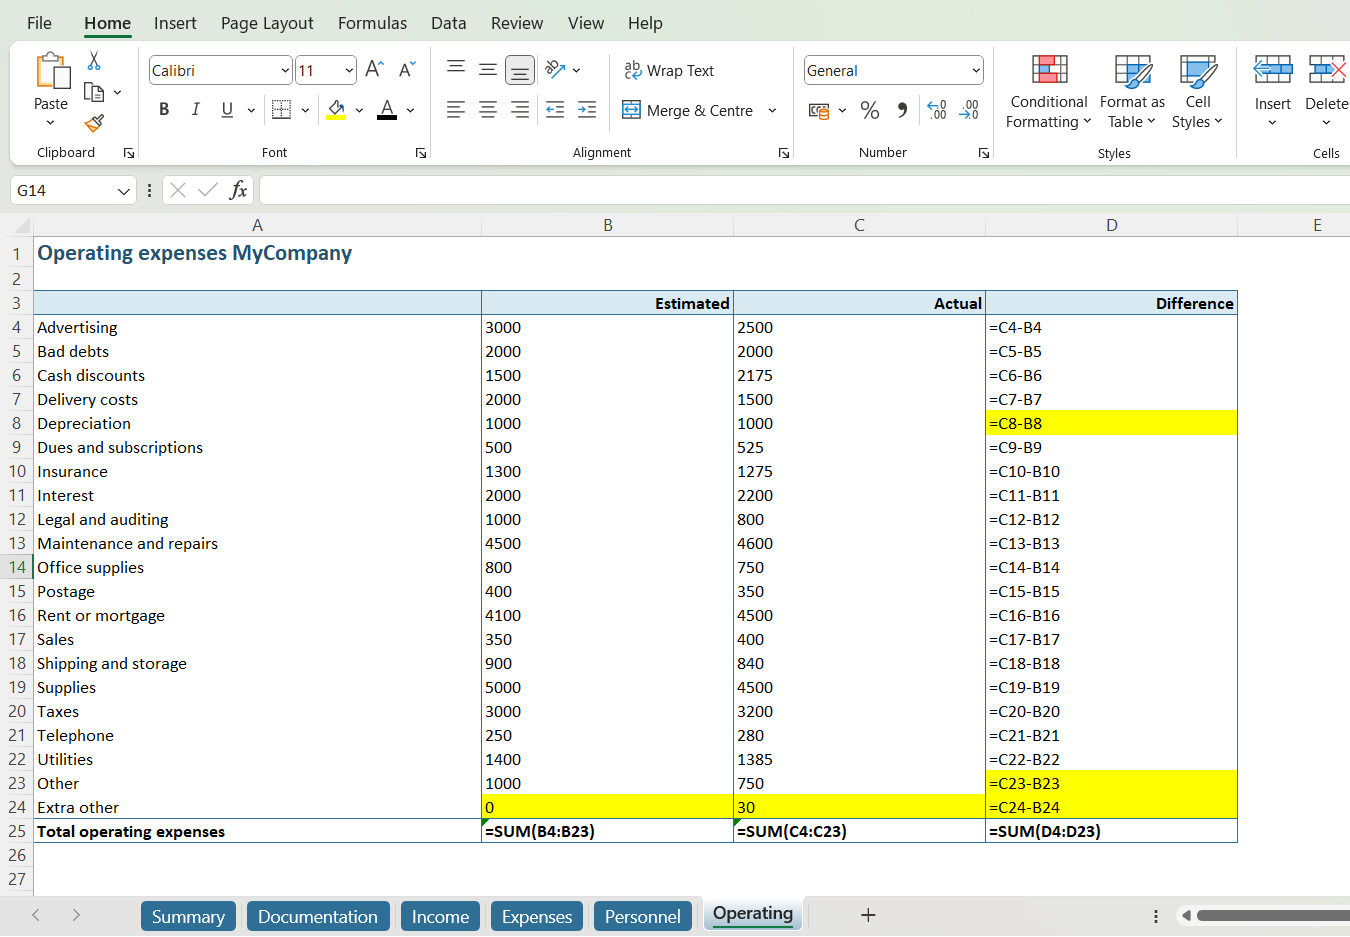
We drag the formula neatly down to cell D8, but the situation in cell D23 needs a bit more attention. The difference here has been increased by 30 more than the actual difference between Estimated and Actual costs. It is better to make these costs transparent so that the formula can be dragged continuously. We add a row below row 23, which we call ‘Extra other.’ In this row, in cell B24, we enter the value ‘0,’ and in cell C24, we enter the value ’30.’ Then we remove ‘+30’ from the formula in D23 and drag =C[x]-D[x] down to D24.
Step 10: Double check
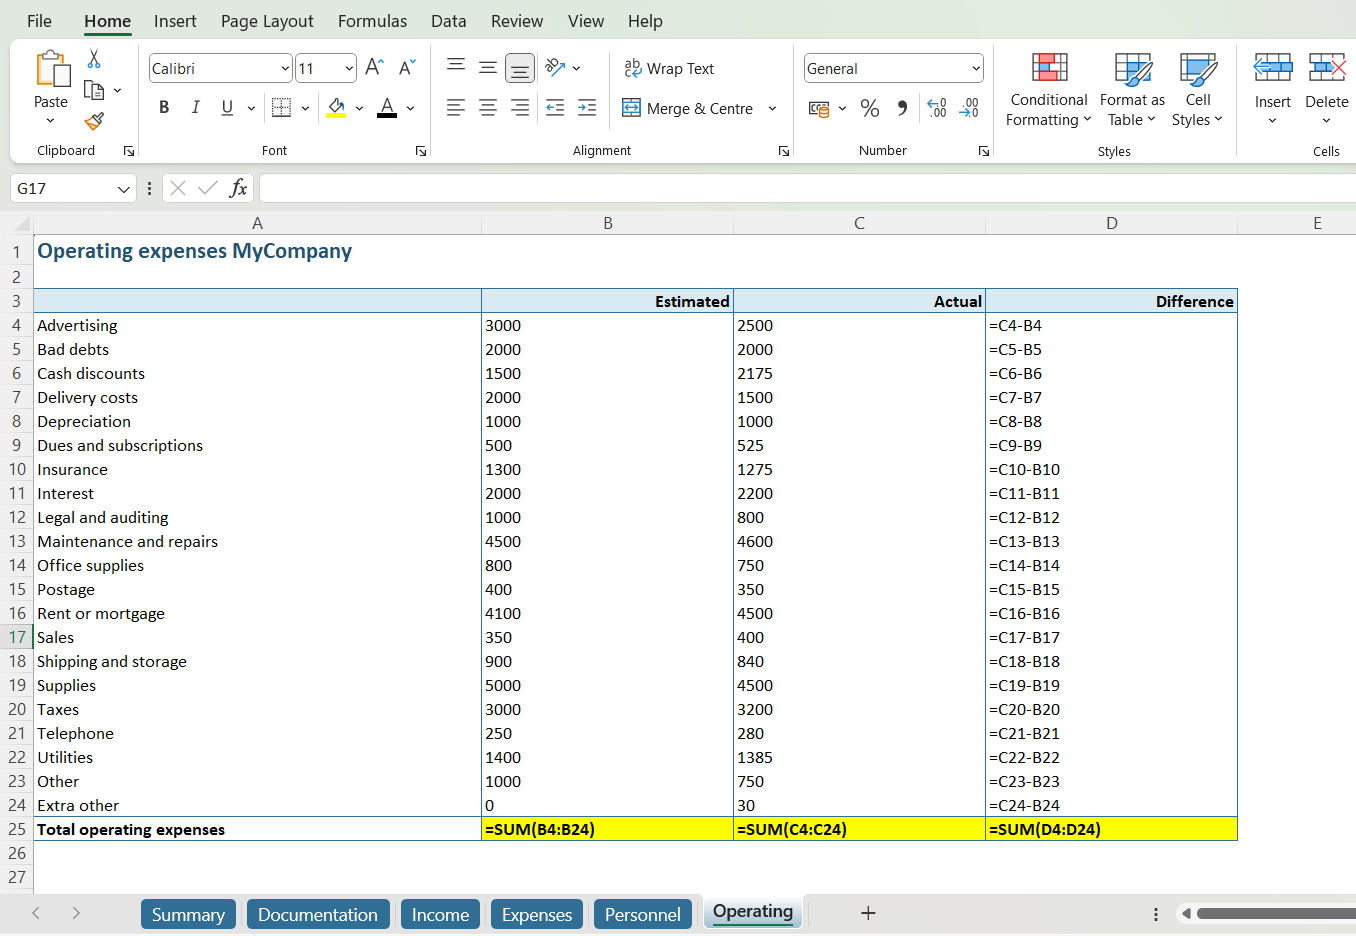
We see that the worksheet now looks much more transparent. However, if we pay close attention, we see that the sums in row 25 have not been automatically dragged down. We correct the sums by dragging the range in cell B25, C25, and D25 from row 4 to row 24.
Step 11: Update Documentation sheet
By now we have made quite a few adjustments in our model, and that’s why the Documentation sheet is absolutely essential. Only by documenting all of our adjustments will we be able to remember our reasons later on and, if necessary, take accountability for them.
Step 12: Check for more hidden elements
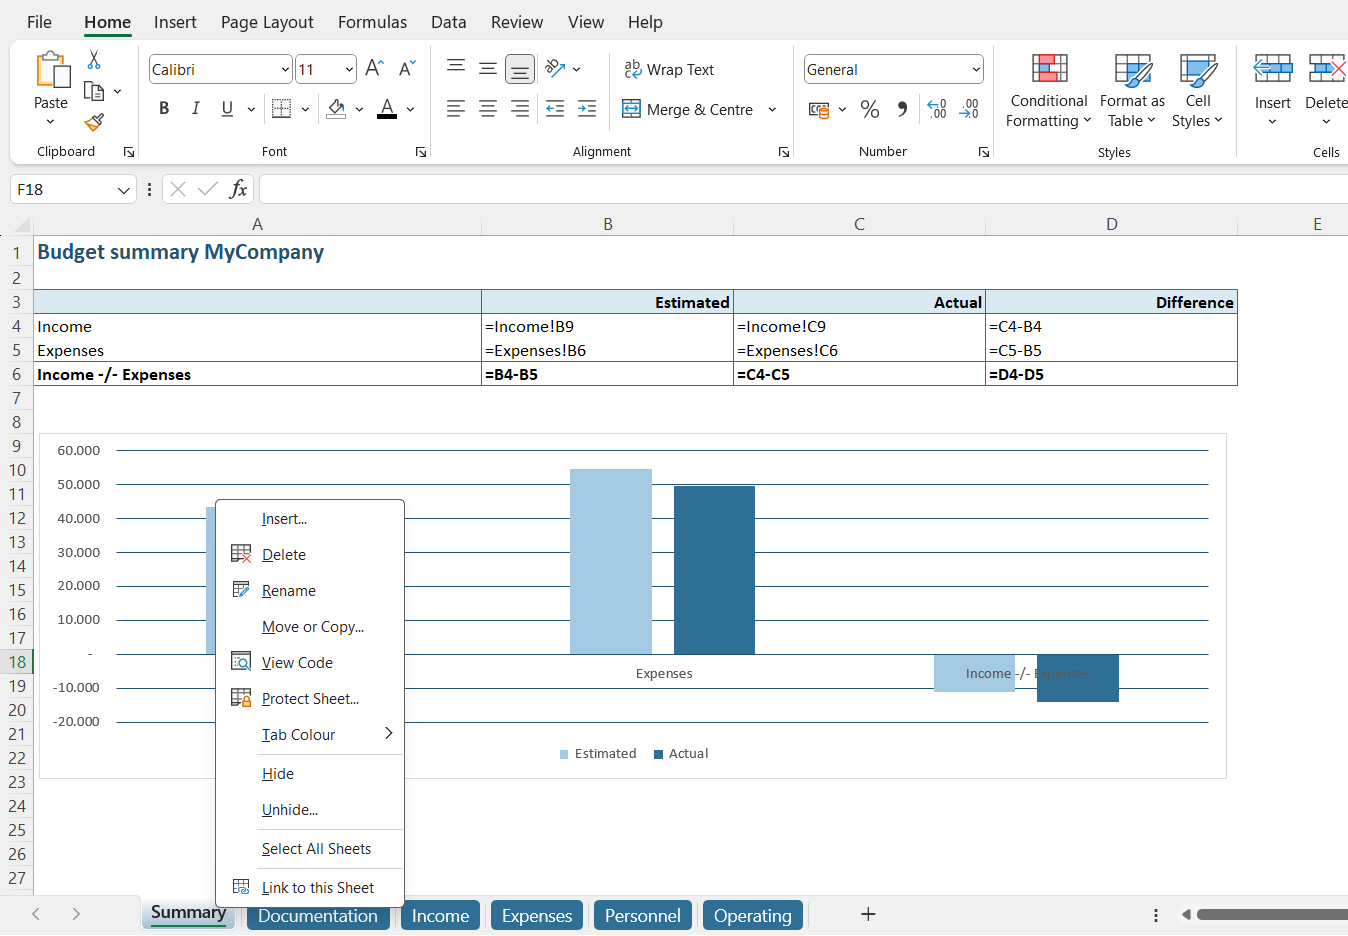
To conclude our quick scan for irregularities, we check if there are any more hidden elements in our file. By right-clicking on a tab, a pop-up appears with the option ‘unhide.’
Step 13: Unhide hidden elements
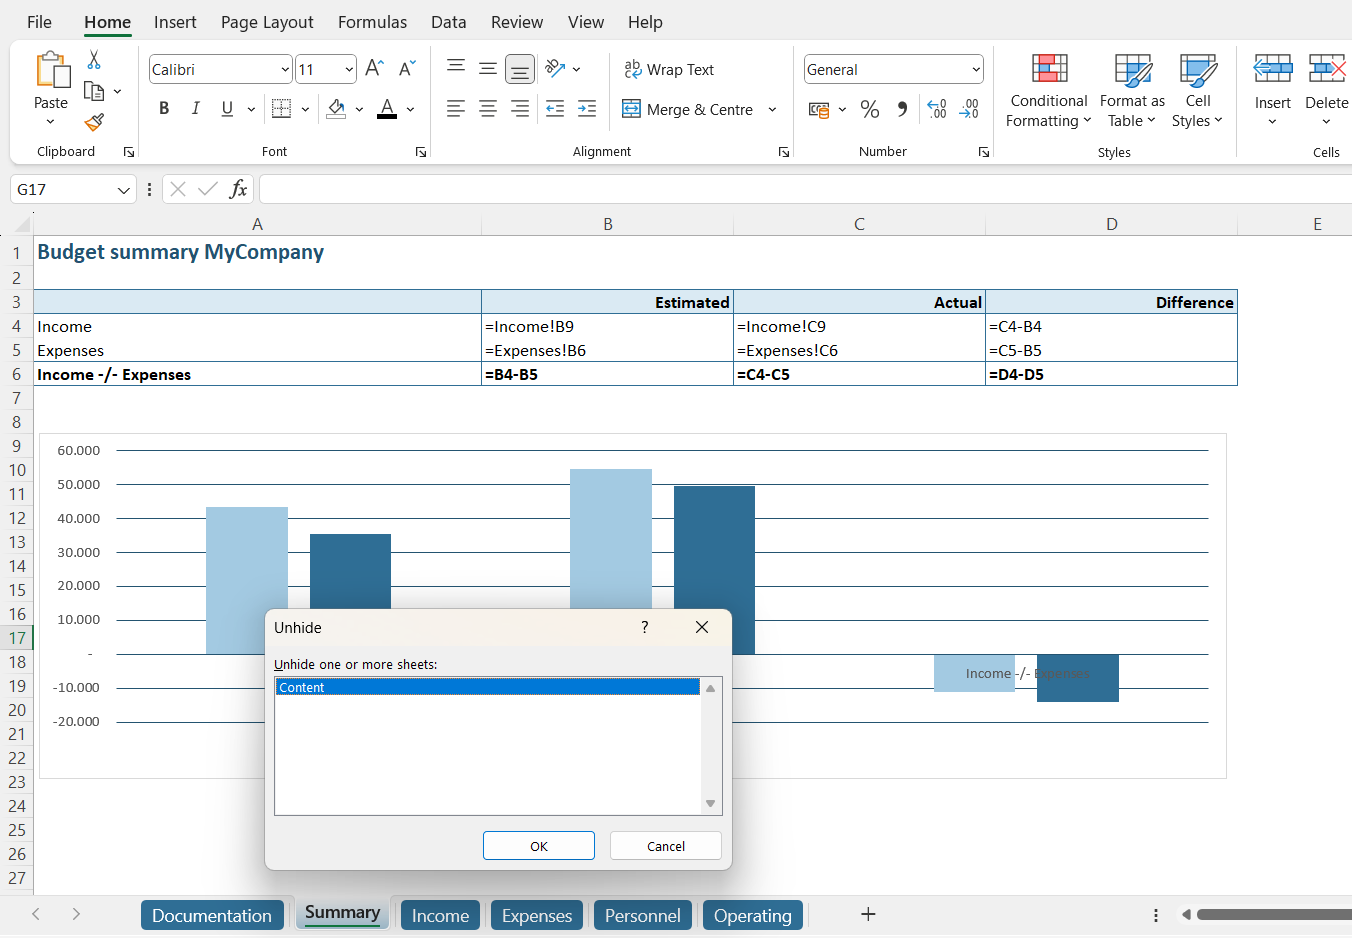
When we click the ‘unhide’ option, we will find that the ‘Content’ tab is hidden. Select the tab and click ‘OK’ to make it visible.
Step 14: Document the Unhide action
We document our ‘Unhide’ action of the content tab in the ‘Documentation’ tab.
Conclusion
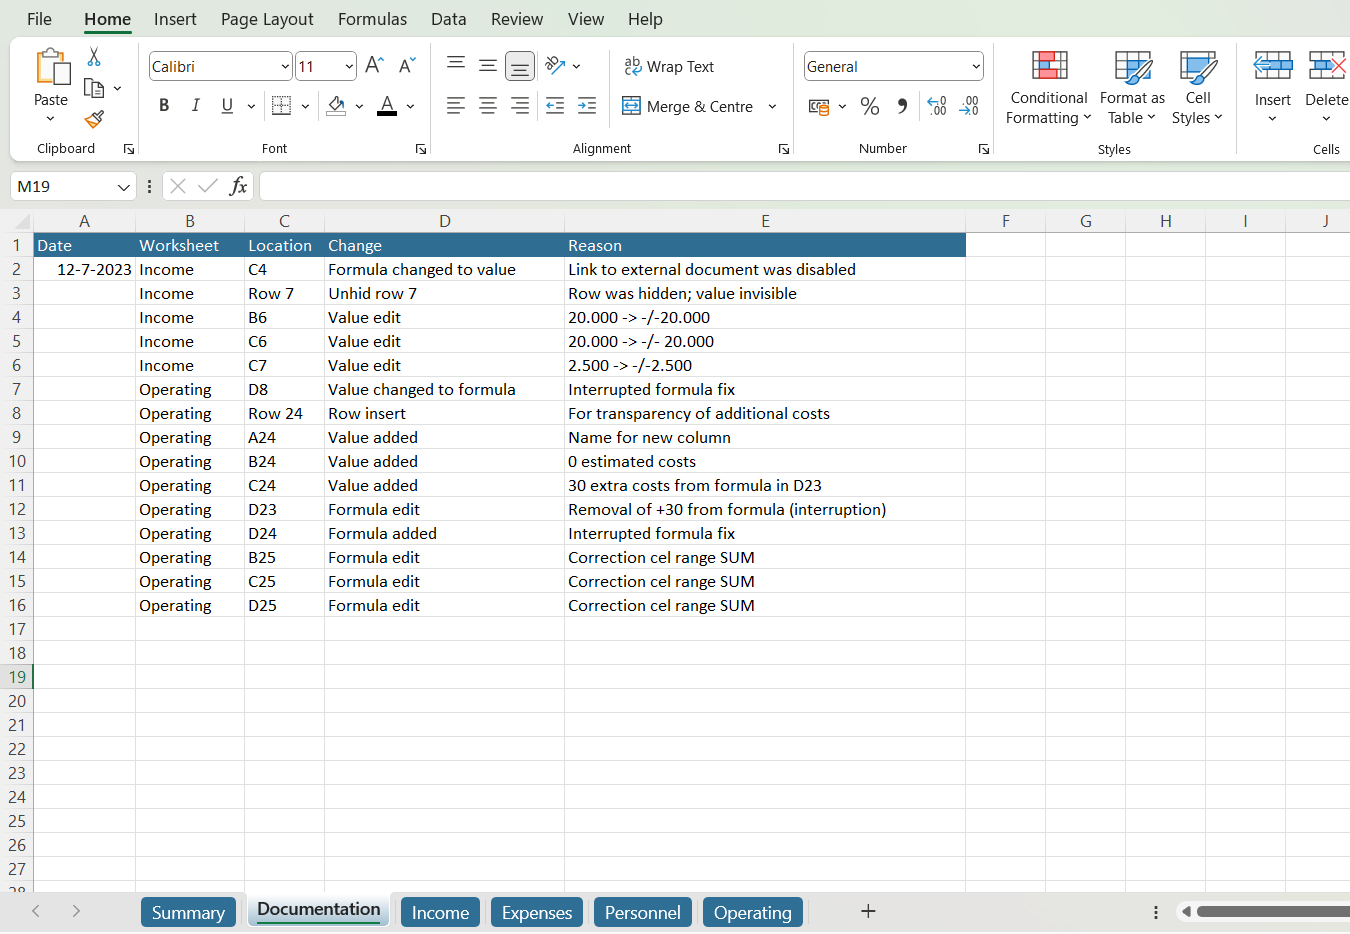
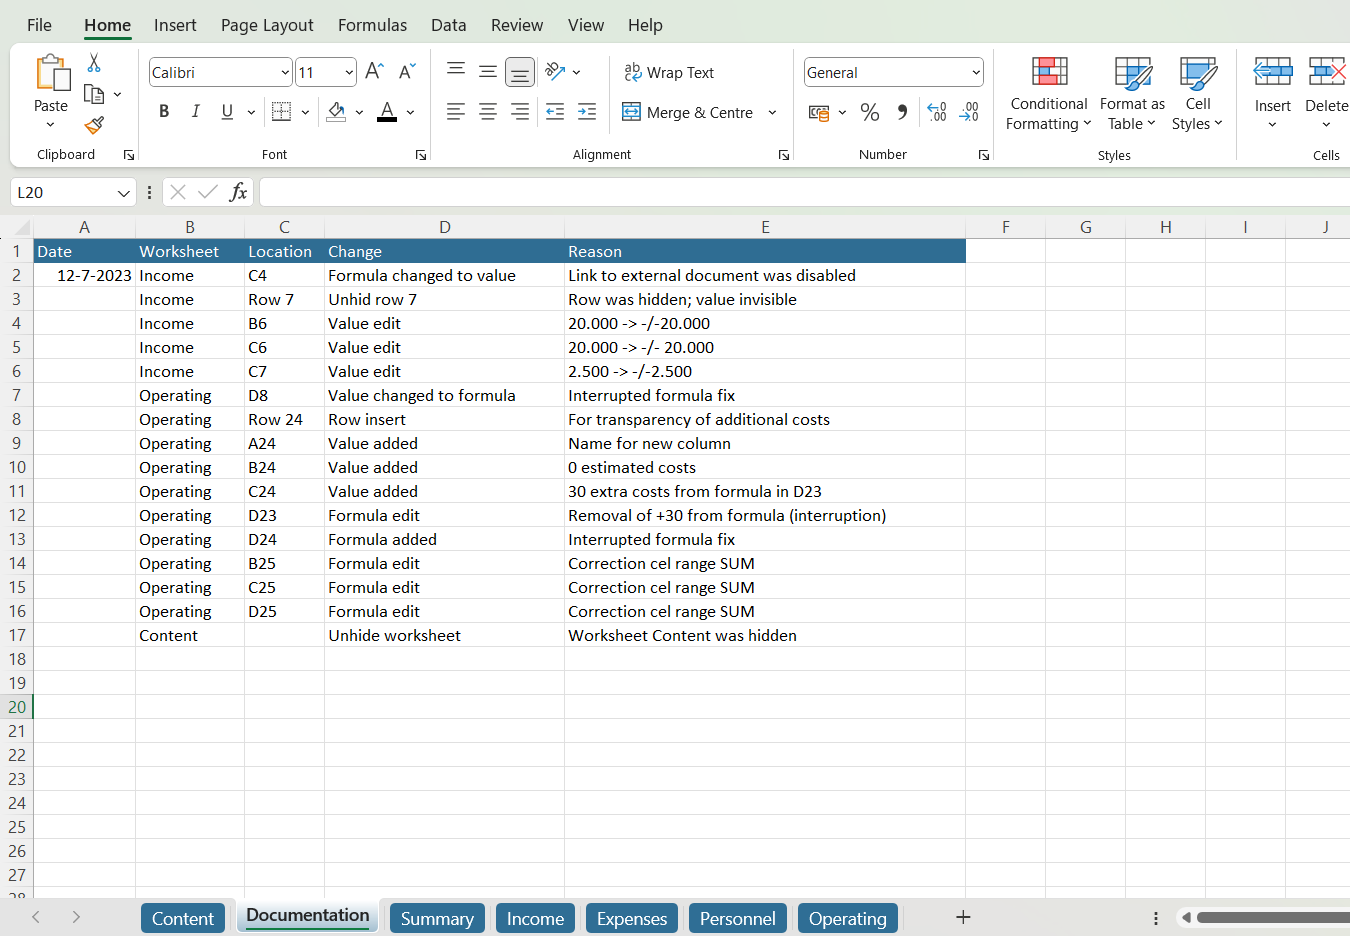
Our final ‘Documentation’ tab shows 16 separate adjustments. This is of great importance to explain to the next user or client what has changed and why. A Documentation sheet is also very useful when we no longer know what the original state of the model was or when we are called to account for these adjustments by an manager or the board.
Keeping a Documentation sheet is a dreadful and very precise job, and if your model is extensive, it also takes a lot of time. But imagine being the second user of the model; you will be grateful that this documentation is available.
Step-by-step with PerfectXL
Step 1: Explore and adjust
Make sure to safe a version of the file in its original state (the exact version you received). Then, go ahead and explore the model. Adjust anything you deem necessary for its quality. We won’t go into the details on how to do this with PerfectXL (see Use case 29 for instructions), but you don’t have to keep track of your changes manually. When you are finished, safe the adjusted version under a different name than the original.
Step 2: Open PerfectXL Compare
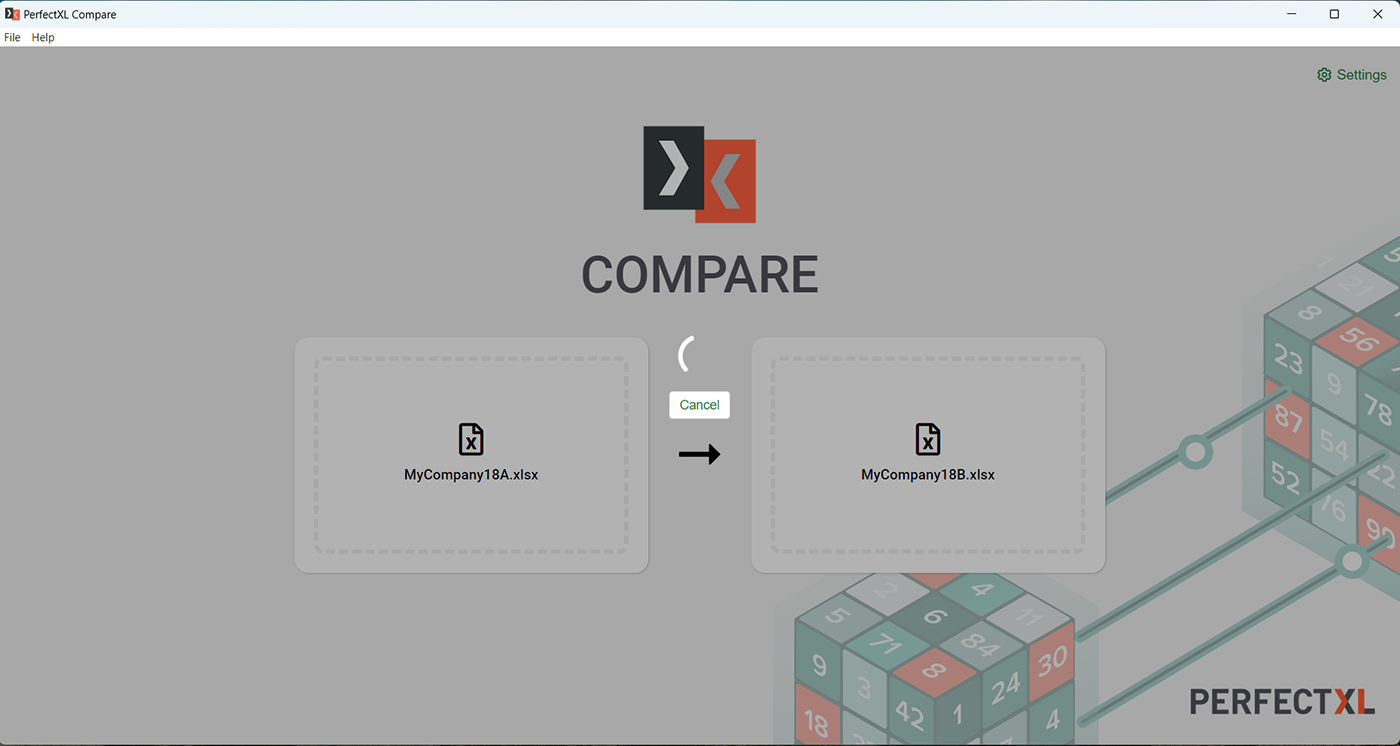
Start up PerfectXL Compare and select both versions of your file:
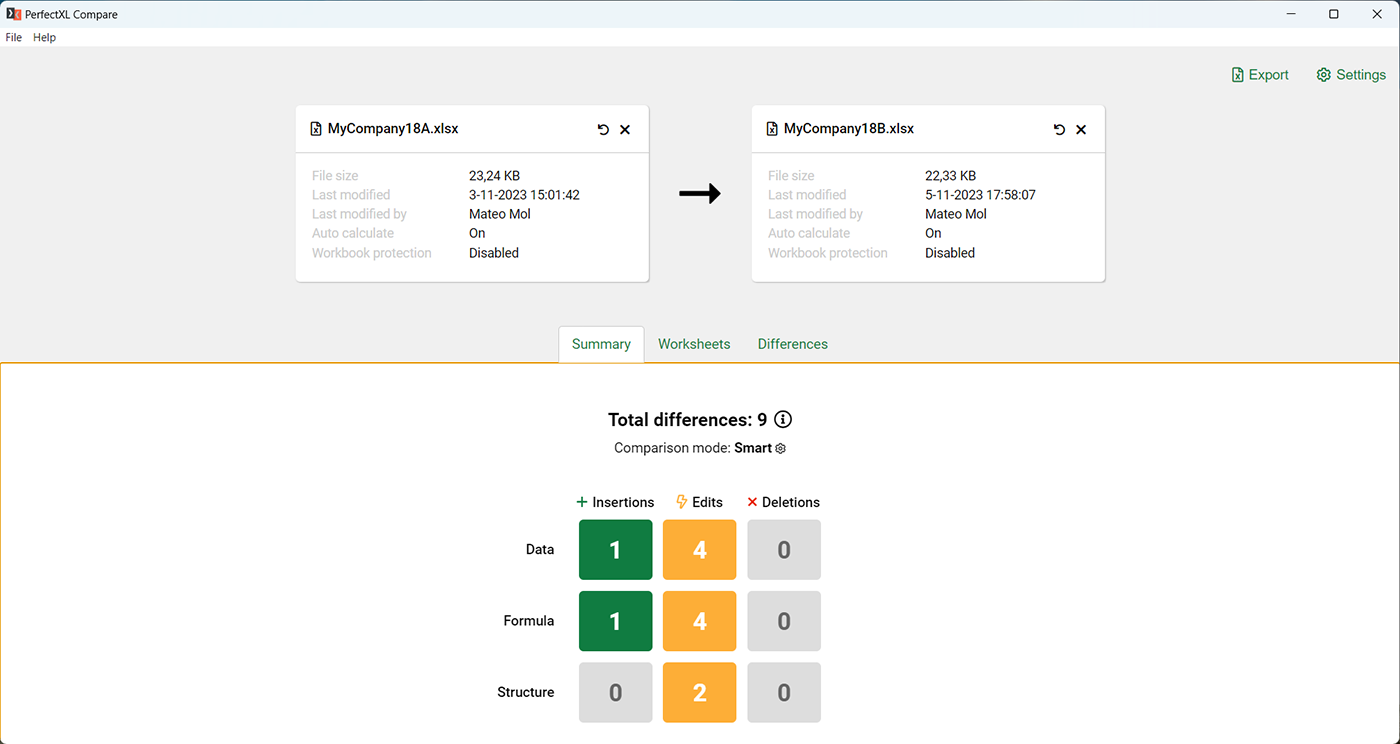
Step 3: Summary of changes
Within a few seconds you should have an analysis, the tool opens to a summary of all differences between the two files.
Step 4: All differences
To see all changes found between the two versions of your file, select the tab “Differences.” Here you can see a complete overview (in aggregated steps) of everything that has changed in the model.
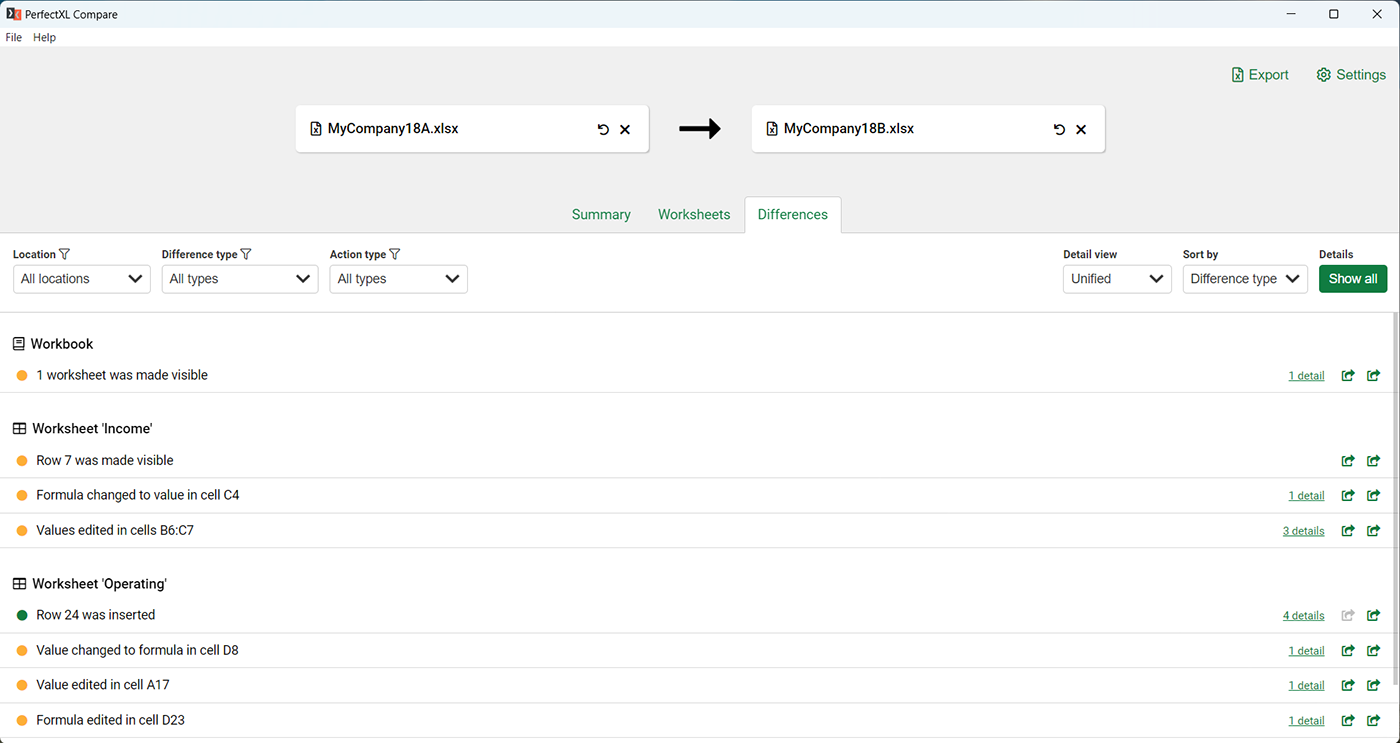
Step 5: Assess changes and create a report
Some differences show one or more details on the right side in green. Click it to drop down the details. If there are any changes you need more context on you can select the green arrows to open the first or second file and jump to the relevant location.
Assuming you only want to create a report, click directly on export at the top right of the tool.

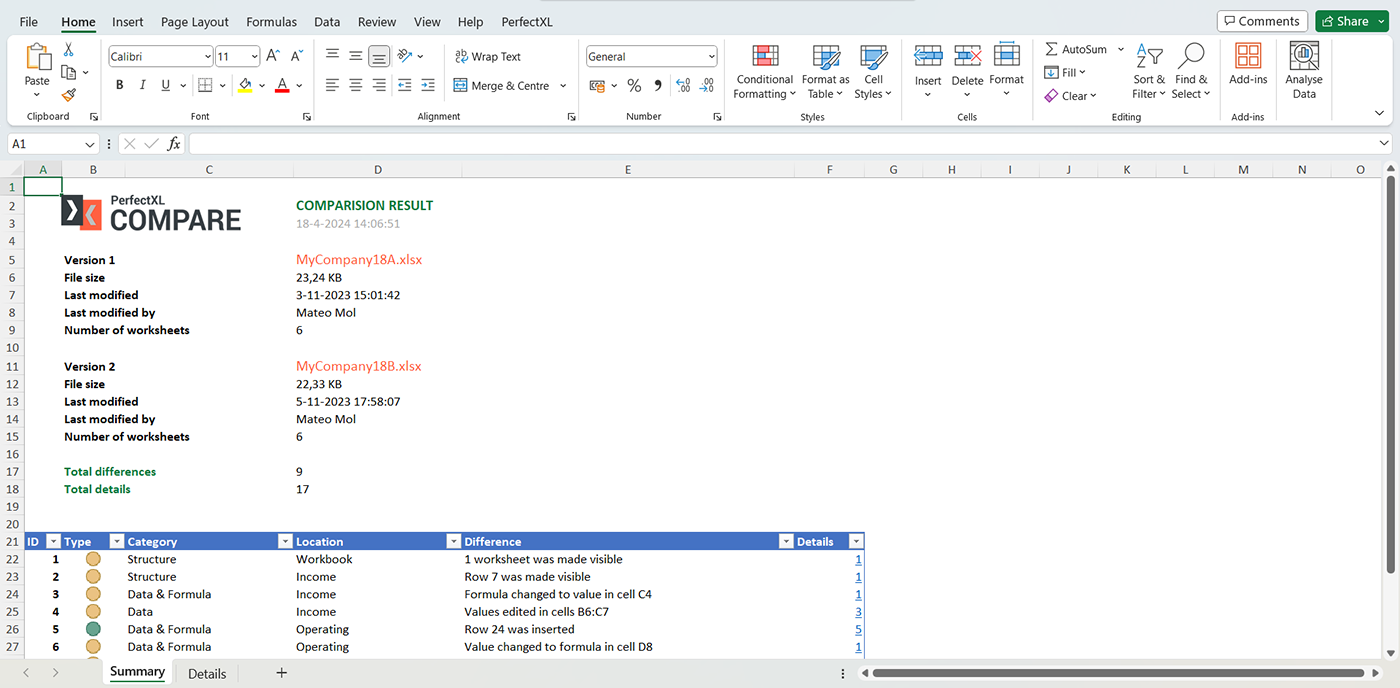
Step 6: The report
The generated report has two tabs, a Summary and a detailed overview (Details).
The Summary shows file info and gives high level insight into what has changed between two versions:
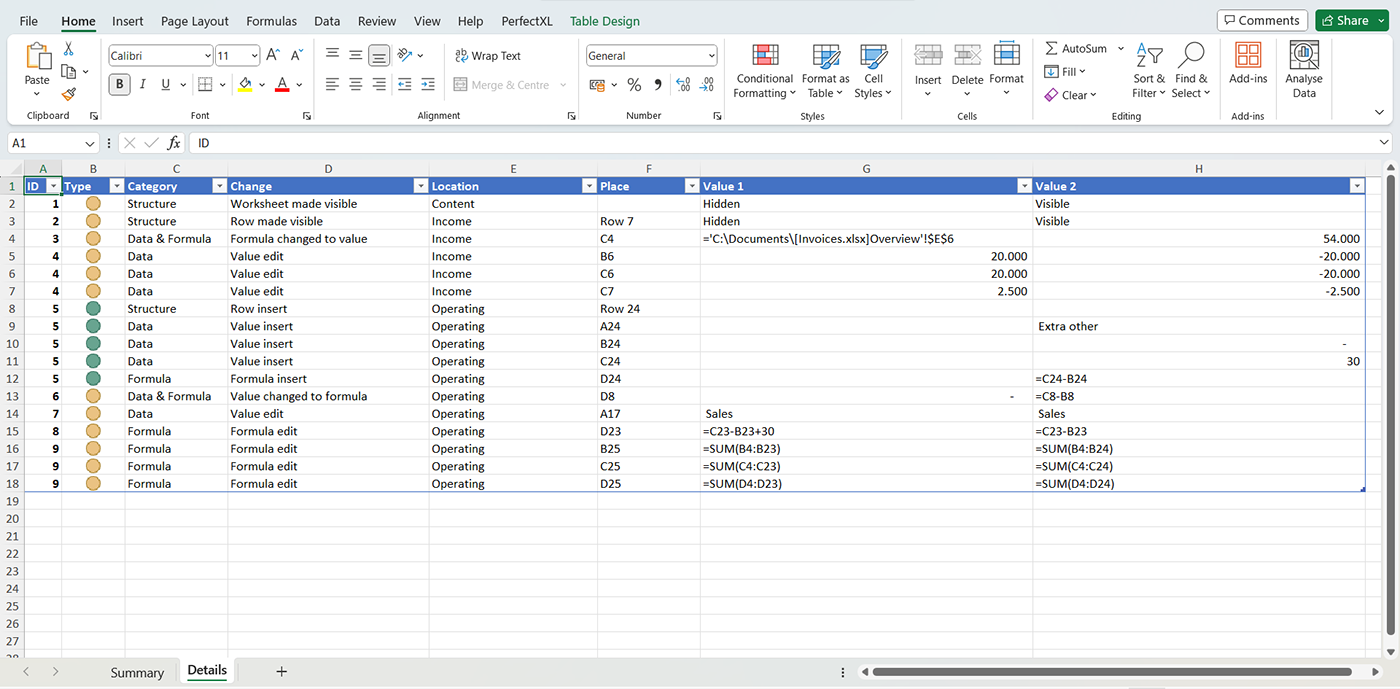
The detailed overview is a cell by cell overview of what has changed, showing the values in version one and the values in version two. In this way you have a complete overview of everything that has changed in the model. You can directly insert this into your model or use it as the basis for documenting changes between two versions.
Conclusion
PerfectXL Compare saves you the time it takes to carefully document every change you make to a model. You can go ahead and make adjustments without the burden of taking notes with every step. Once you are done you simply upload the old and new version of the file to PerfectXL Compare and a comprehensive report is created for you instantly.